|
Labels, ratings, and flags |
  
|
|
Labels, ratings, and flags |
|
Color labels, star ratings, and flags are the quickest way to help you find what your looking for more quickly.
Color labels let you categorize your images visually. There are five colors and the unlabeled state. Color labels are often used to categorize images by purpose or edit status. For example, you can assign a red label to images that need post-processing or heavy retouching. You can assign a blue label to images that are part of a panorama or another series.
You can also use color labels to indicate the status of your images. For example, you can assign a yellow label to images that you have posted to your photo-sharing website, green labels to images that you have sold to a client or stock agency, and red labels to images in your catalog that have restricted copyright usage.
It is best to be consistent and complete when you use a color label system.
Each version can have only one color label, so try to avoid using labels for status or indicators that are not mutually exclusive. For example, an image could have both restrictive copyright usage and could be posted to a photo-sharing website. It is better to use keyword hierarchies for status indicators that are not mutually exclusive.
To assign a color label
| 1. | In the Thumbnail panel, select the images that you want to label. |
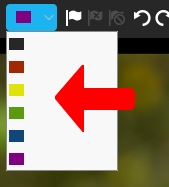
| 2. | On the Top toolbar, click the Label drop-down menu and choose a color. |
The color labels appear in the lower-right corner of the thumbnails.
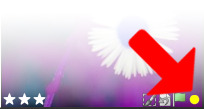
Tip: You can also assign a color label to a thumbnail by positioning your pointer over the bottom right corner of a thumbnail and clicking the color label icon to display and choose a color.
Star ratings are a great way to help you to find your best images quickly. You can assign ratings to images in your catalog to quickly select or filter images.
To assign star ratings
| 1. | In the Thumbnail panel, select the images that you want to rate. |
| 2. | Do one of the following: |
| • | Click one of the stars |
| • | Press Ctrl + [1,2,3,4, or 5]. |
You can use flags to pick (Flag as Pick) or reject (Flag as Reject) images. You can also clear flags that you assign (Clear Flag). Flagging is a great way to quickly assess images. You can also use flags to mark images that you are in the process of editing or you can flag several images with similar content so you can quickly select and compare them when trying to select the best version.
You can flag a file or version as reject to help you keep your catalog free of out of focus or otherwise poor quality images. One workflow would be to scan through new images, flagging the poor quality images as Reject. After all images have been reviewed, use the filter to show only the rejected images to verify that you marked only the poor quality images, then permanently delete the Reject images. You can also keep images that you flag as Reject — after they are flagged as Reject, they do not show up in the standard view of your Catalog, while leaving them on your computer just in case you do need that image later.
To flag images
| 1. | In the Thumbnail panel, select the images that you want to flag. |
| 2. | Do one of the following: |
| • | Click the Flag as Pick |
| • | Press . (period key) to pick or press , (comma key) to reject images. |
If you want to clear a flag, click the Clear Flag button ![]() .
.
You can also mark a version as rejected, Alt+Click (Option+Click on Mac, Alt+Shift+Click on Linux) on the flag indicator.
© 2014 Corel Corporation. Note: The availability of features depends on the version of the software you have.