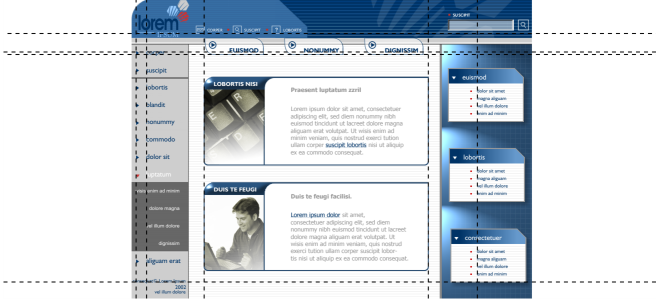
Guidelines are lines that can be placed anywhere in the drawing window to aid in object placement. In some applications, guidelines are known as guides.
There are three types of guidelines: horizontal, vertical, and angled. By default, the application displays guidelines that you add to the drawing window, but you can hide them at any time. You can also use objects as guides.
You can set guidelines for individual pages or you can set guidelines for the entire document. For more information about local and master guidelines, see Local layers and master layers.
You can add a guideline wherever you need one; however, you can also choose to add preset guidelines. There are two types of preset guidelines: Corel presets and user-defined presets. Examples of Corel presets include guidelines that appear at 1-inch margins and guidelines that appear at newsletter column borders. User-defined presets are guidelines whose location you specify. For example, you can add preset guidelines that display margins at a distance you specify or that define a column layout or grid. You can remove guidelines at any time.
You can have objects snap to the guidelines, so that when an object is moved near a guideline, it can only be centered on the guideline or lined up on either side of the guideline.
Guidelines use the unit of measure specified for rulers. For information about ruler settings, see To customize ruler settings.
Guidelines can be placed in the drawing window to aid in object placement.

You can also display or hide the guidelines by clicking Window  Dockers
  Guidelines and clicking the Show or hide guidelines button
  .
.
You can also access additional guideline options by clicking Layout  Document Options, and then clicking Guidelines in the left pane of the dialog box that appears.
| 1 . |
Click Window  Dockers Dockers  Guidelines. Guidelines. |

You can also add a guideline by dragging from the horizontal or vertical ruler to the drawing window.
| 1 . |
Click Window  Dockers Dockers  Guidelines. Guidelines. |
| 2 . |
Choose Angled from the Guideline type list box. |

You can also add an angled guideline by dragging from the horizontal or vertical ruler in the drawing window, and typing a value in the Angle of rotation box on the property bar.
| 1 . |
In the Objects docker, click the Guides layer on the page you want. |
|
If the Objects docker is not open, click Object  Objects. Objects. |
| 1 . |
In the Objects docker, click Guides (all pages) on the Master page. |
|
If the Objects docker is not open, click Object  Objects. Objects. |

The guidelines that you set on the Guides (all pages) layer of the Master page appear on all pages of the document. These guidelines appear in addition to any guidelines that you set for individual pages.
| 1 . |
Click Layout  Document Options. Document Options. |
| 5 . |
Specify guideline settings by enabling the corresponding check boxes. |
|
If you enable the User-defined presets option, specify values in the Margins, Columns, or Grid area. |
| 1 . |
Click Window  Dockers Dockers  Guidelines. Guidelines. |

You can also remove individual guidelines by dragging them off the document window, or clicking a guideline with the Pick tool and pressing Delete.
To delete a preset guideline, click Layout  Document Options. In the left pane of the dialog box that appears, click Guidelines, and then click Presets. Disable the check box beside the preset guideline that you want to delete.
| 1 . |
Click View  Snap To Snap To  Guidelines. Guidelines. |

You can also set objects and editable areas to snap to a guideline by clicking Window  Dockers
  Guidelines and clicking the Snap to guidelines button
  .
.

The features documented in the Help are available in the full version of CorelDRAW Graphics Suite 2019. Some features may not be available in this version of the product.

![]() Dockers
Dockers ![]() Guidelines and clicking the Show or hide guidelines button
Guidelines and clicking the Show or hide guidelines button .
![]() Document Options, and then clicking Guidelines in the left pane of the dialog box that appears.
Document Options, and then clicking Guidelines in the left pane of the dialog box that appears.![]() Document Options. In the left pane of the dialog box that appears, click Guidelines, and then click Presets. Disable the check box beside the preset guideline that you want to delete.
Document Options. In the left pane of the dialog box that appears, click Guidelines, and then click Presets. Disable the check box beside the preset guideline that you want to delete.![]() Dockers
Dockers ![]() Guidelines and clicking the Snap to guidelines button
Guidelines and clicking the Snap to guidelines button .