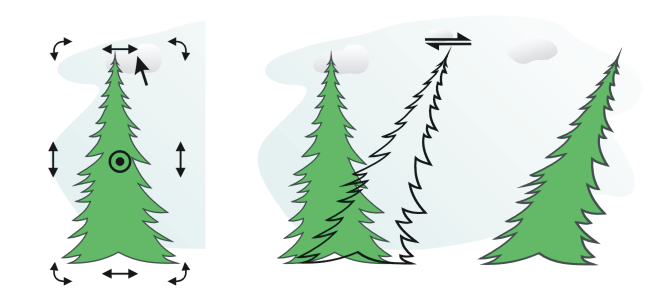
You can skew and stretch objects in CorelDRAW. When you skew an object, you specify the degree by which you want to slant the object. Stretching changes an object’s vertical and horizontal dimensions non proportionally.
CorelDRAW also lets you change the skew and sizing anchor point of an object from its default center position.
Skewing an object horizontally
Stretching an object horizontally
| 3 . |
Click the Free skew button  on the property bar. on the property bar. |
| 4 . |
Type values in the Skew angle boxes on the property bar to specify the number of degrees by which you want to skew the object horizontally or vertically. |

You can also skew an object interactively by dragging one of its skew handles  . If the skew handles are not displayed, click the selected object again, and point to the middle handles.
You can also access skewing options from the Transform docker.
| 2 . |
Click Window  Dockers Dockers  Transform. Transform. |
| 3 . |
In the Transform docker, click the Size button. |
|
• |
W — lets you specify the width of a selected object |
|
• |
H — lets you specify the height of a selected object |

The new values that you enter to stretch an object are the basis for a new ratio of the horizontal and vertical dimensions of the object. When you enable the Proportional check box, any resizing of the object is based on this new ratio. To revert the object to its original one-to-one proportions before transforming it again, you must enable the Proportional check box, and then retype the original values.

You can change object dimensions proportionally by enabling the Proportional check box, typing a value in either the H or W box, and pressing Enter.
You can also stretch an object from its center by pressing Shift and dragging a corner selection handle.
You can also stretch an object in increments of 100% by pressing Ctrl, and dragging a corner selection handle.

The features documented in the Help are available in the full version of CorelDRAW Graphics Suite 2019. Some features may not be available in this version of the product.
