To paste an object into a drawing
To create copies of an object at a specified position
To create copies of objects quickly
You can use other methods to create copies of objects quickly, without using the Clipboard. You can use the plus sign (+) on the numeric keypad to place a copy of an object on top of the original object, or you can create copies instantly by pressing the Spacebar or right-clicking while dragging an object.
| To cut or copy an object |
|
| 1 . | Select an object. |
| 2 . | Click Edit, and click one of the following: |
| • | Cut |
| • | Copy |
You can also cut or copy an object by right-clicking the object and clicking Cut or Copy.
| To paste an object into a drawing |
|
| • | Click Edit |
You can use this procedure to paste an object from another application.
To paste an object from an unsupported file format, or to specify options for the pasted object, click Edit ![]() Paste Special. For more information about pasting objects from other applications, see Link and embed objects.
Paste Special. For more information about pasting objects from other applications, see Link and embed objects.
| To duplicate an object |
|
| 1 . | Select an object. |
| 2 . | Click Edit |
You can also duplicate a selected object by pressing Ctrl + D.
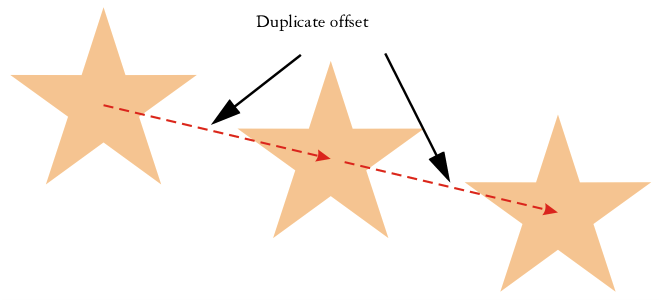
To change the default duplicate offset, click Layout ![]() Document Options. On the General page, type values in the Horizontal and Vertical boxes.
Document Options. On the General page, type values in the Horizontal and Vertical boxes.
| • | Offset values of 0 place the duplicate on top of the original. |
| • | Positive offset values place the duplicate up and to the right of the original. |
| • | Negative offset values place the duplicate down and to the left of the original. |
| To create copies of an object at a specified position |
|
| 1 . | Select an object. |
| 2 . | Click Edit |
| 3 . | In the Step and Repeat docker, type a value in the Number of copies box, and click Apply. |
|
In the Vertical settings area, choose No offset from the Mode list box. In the Horizontal settings area, choose Spacing between objects from the Mode list box. To specify the spacing between object copies, type a value in the Distance box. To place the object copies to the right or left of the original, choose Right or Left from the Direction list box.
|
|
|
In the Horizontal settings area, choose No offset from the Mode list box. In the Vertical settings area, choose Spacing between objects from the Mode list box. To specify the spacing between copies of objects, type a value in the Distance box. To place the copies above or below the original, choose Up or Down from the Direction list box.
|
|
|
In the Horizontal settings and Vertical settings areas, choose Offset from the Mode list box, and type values in the Distance boxes.
|
Multiple copies of an object are offset by a specified distance.
You can access the Step and Repeat docker by pressing Ctrl + Shift + D.
| To create copies of objects quickly |
|
| 1 . | Select an object by using the Pick tool |
| 2 . | Press the Spacebar while rotating or transforming the object. |
|
Press the plus sign (+) on the numeric keypad.
|
|
|
While moving, rotating, or transforming the object, right-click and then release both mouse buttons.
|
| To transform the duplicate of an object |
|
| 1 . | Select an object. |
| 2 . | Click Window |
| 3 . | Choose the settings you want in the Transform docker. |
| 4 . | Type 1 in the Copies box. |
| 5 . | Click Apply. |
You can clear a transformation by selecting an object and clicking Object ![]() Clear Transformations.
Clear Transformations.
| To delete an object |
|
| 1 . | Select an object. |
| 2 . | Click Edit |
To retrieve a deleted object, you must use the Undo command. For more information, see Undo, redo, and repeat actions.
You can also delete an object by selecting it and pressing Delete.
The features documented in the Help are available in the full version of CorelDRAW Graphics Suite 2020. Some features may not be available in this version of the product.