| • | To apply a perspective |
| • | To copy an object’s perspective effect |
| • | To adjust the perspective |
| • | To remove a perspective effect from an object |
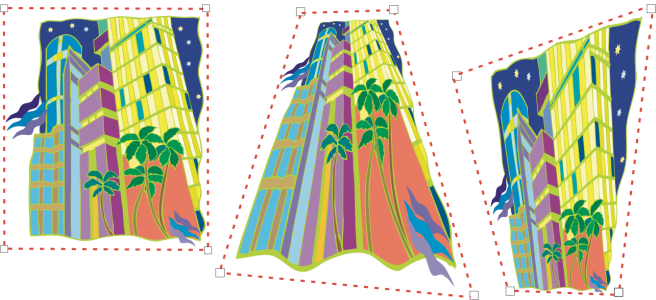
Adding perspective to objects creates the illusion of distance and depth. You can create a perspective effect by shortening one or two sides of an object. This effect gives an object the appearance of receding in one or two directions, thereby creating a one-point perspective or a two-point perspective.
The original graphic (left) with one-point (middle) and two-point (right) perspective applied to it.
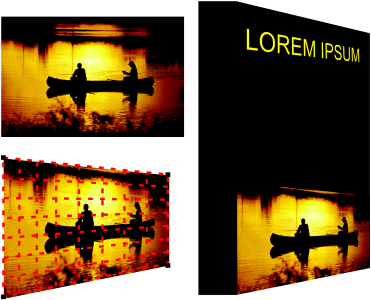
Two-point perspective (bottom left) is applied to a bitmap (top left).
The perspective effect is applied nondestructively, so you can edit it or remove it and revert to the original image at any point. After you add perspective to bitmaps, you can transform and manipulate them as you would any other vector objects. For information about transforming objects, see Working with objects.
Perspective effects can be added to objects or grouped objects.
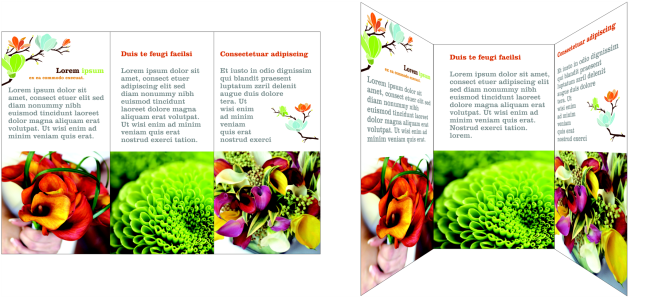
Perspective is applied to a group of vector and bitmap objects
You can also add a perspective effect to linked groups, such as contours, blends, and extrusions. You can’t add perspective effects to paragraph text or symbols.
| To apply a perspective |
|
|
Click Effects
|
|
|
Click Effects
|
Pressing Ctrl constrains the node’s movement to the horizontal or vertical axis to create a one-point perspective effect.
Press Ctrl + Shift as you drag to move two adjacent nodes symmetrically towards or away from a central point. This is useful when you want to distort an image symmetrically.
| To copy an object’s perspective effect |
|
| 1 . | Select an object to which you want to apply a perspective effect. |
| 2 . | Click Effects |
| 3 . | Select an object whose perspective effect you want to copy. |
You can also use the Attributes eyedropper tool ![]() to copy a perspective effect. For more information, see To copy effects from one object to another.
to copy a perspective effect. For more information, see To copy effects from one object to another.
| To adjust the perspective |
|
| 1 . | In the toolbox, click the Shape tool |
| 2 . | Select an object that has a perspective effect. |
| 3 . | Drag a node to a new position. |
Pressing Ctrl constrains a node’s movement to the horizontal or vertical axis to create a one-point perspective effect.
You can also adjust one-point perspective by dragging a vanishing point.
Press Ctrl + Shift as you drag to move adjacent nodes closer together or further apart along a horizontal or vertical axis. This is useful when you want to achieve a symmetrical perspective effect.
| To remove a perspective effect from an object |
|
| 1 . | Select an object that has a perspective effect. |
| 2 . | Click Effects |
![]()
Not all suite components documented in this Help are available in our Trial, Academic, and OEM versions. Unavailable components may include Corel applications, product features, third-party utilities, and extra content files.
Copyright 2018 Corel Corporation. All rights reserved.