| • | To change an image to a duotone |
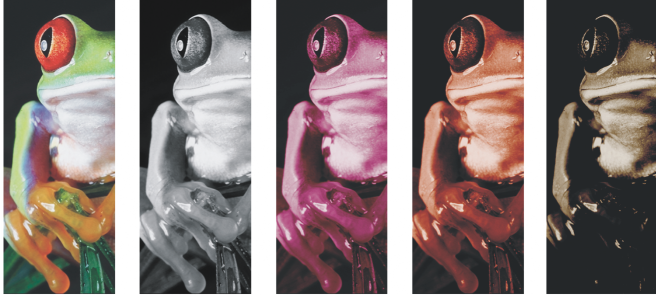
The following four variations of the color mode correspond to the number of additional inks:
| • | Monotone — a grayscale image colored with a single tone |
| • | Duotone — a grayscale image colored with two tones. In most cases, one is black and the other is colored. |
| • | Tritone — a grayscale image colored with three tones. In most cases, one is black and the other two are colored. |
| • | Quadtone — a grayscale image colored with four tones. In most cases, one is black and the other three are colored. |
Specifying how overprint colors display
Duotones hold their color ink information when you save to Encapsulated PostScript (EPS), Portable Document Format (PDF) and CorelDRAW (CDR) file formats. Other file formats don’t support duotone images.
| To change an image to a duotone |
|
| 1 . | Click a bitmap. |
| 2 . | Click Bitmaps |
| 3 . | Click the Curves tab. |
| 4 . | Choose a duotone type from the Type list box. |
| 5 . | Double-click an ink color in the Type window. |
| 6 . | In the Select color dialog box, choose a color, and click OK. |
| If you want to adjust the color’s tone curve, click the ink tone curve on the grid to add a node, and drag the node to adjust the percentage of color at that point on the curve. |
| 7 . | Repeat steps 5 and 6 for each ink color you want to use. |
|
Enable the Show all check box.
|
|
|
Click Save. Choose the disk and folder where you want to save the file, and type a filename in the File name box.
|
|
|
Click the Overprint tab, and enable the Use overprint check box. Double-click the color you want to edit, and choose a new color.
|
You can load preset ink colors by clicking Load, locating the file in which the ink settings are stored, and double-clicking the filename.
![]()
Not all suite components documented in this Help are available in our Trial, Academic, and OEM versions. Unavailable components may include Corel applications, product features, third-party utilities, and extra content files.
Copyright 2018 Corel Corporation. All rights reserved.