| • | To distort an object |
| • | To remove a distortion |
| • | To copy a distortion |
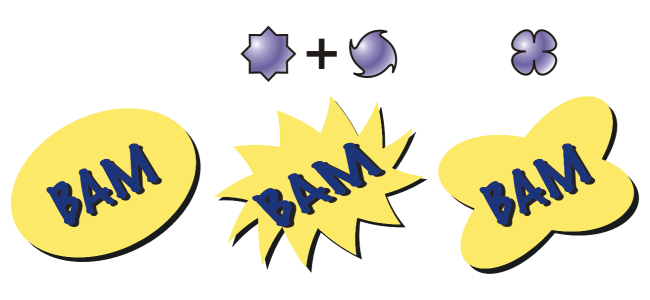
You can apply three types of distortion effects to shape objects.
From left to right: Original image; Zipper and Twister distortions applied; Pull distortion applied
You can create an even more dramatic effect by applying a new distortion to an already distorted object. You don’t lose the effect of the original distortion if, for example, you apply a zipper distortion on top of a twister distortion. The CorelDRAW application also lets you remove and copy distortion effects.
| To distort an object |
|
| 1 . | In the toolbox, click the Distort tool |
| 2 . | On the property bar, click one of the following buttons, and specify the settings you want: |
| • | Push and pull distortion |
| • | Zipper distortion |
| • | Twister distortion |
| 3 . | Point to where you want to place the center of distortion, and drag until the object is the shape you want. |
|
Choose a distortion preset from the Preset list box on the property bar.
|
|
You can reapply the effects to distorted objects.
You can center a distortion by clicking the Center distortion button on the property bar.
| To remove a distortion |
|
| 1 . | Select a distorted object. |
| 2 . | Click Effects |
Removing a distortion this way clears the most recent distortion you’ve applied.
You can also remove a distortion from a selected object by clicking the Clear distortion button on the property bar.
| To copy a distortion |
|
| 1 . | Select the object to which you want to copy a distortion. |
| 2 . | Click Effects |
| 3 . | Click a distorted object. |
You can also use the Eyedropper tool to copy the effect. For more information, see To copy effects from one object to another.
![]()
Some features described in the Help are not included in this version of the product, and are available only in CorelDRAW Graphics Suite 2018.
Copyright 2018 Corel Corporation. All rights reserved.