
| • | To use the Healing Clone tool |
As with other brush tools in Corel PHOTO-PAINT, you can adjust the size of the brush nib by holding down Shift, and you can modify brush attributes such as nib and dab properties in the Brush Settings docker. When using big brush nibs, you can also disable the live preview to improve performance.
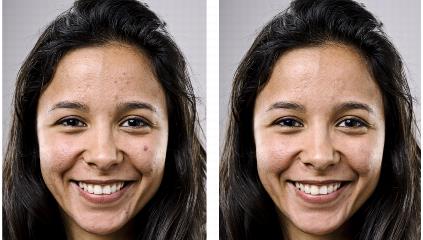
Removing an imperfection from a photo subject
| To use the Healing Clone tool |
|
| 1 . | In the toolbox, click the Healing Clone tool |
| 2 . | Specify the settings you want on the property bar. |
| 3 . | Click the image to set a source point, sampling the texture that you want. |
| If you want to reset the source point, right-click the area that you want to sample. |
| 4 . | Drag across the area that you want to cover. |
|
Hold down Shift + Alt, and drag in the image window.
|
|
|
Hold down Shift, and drag towards or away from the nib center.
|
|
|
Click Window
|
|
|
On the property bar, click the Preview button to disable it.
|
Copyright 2015 Corel Corporation. All rights reserved.