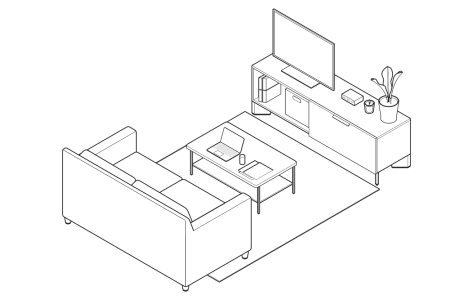
The thick and thin line drawing mode lets you add depth and detail to your technical illustration and is especially useful when you draw and edit shapes in projected view. Corel DESIGNER automatically splits the shapes and applies thin and thick lines, saving you time and effort. A thin line shows that adjacent object areas are visible; a thick line shows that the area beyond the line is hidden from view.
Use the Thick and thin line drawing mode to quickly add depth and detail to your illustration.
Thick and thin line drawing can also be used with curves and unprojected shapes to ensure consistent line widths in a drawing.
If the line widths applied are not as expected, you can replace thick lines with thin lines and vice versa. You can also separate the thick line applied to a shape so that the thin line becomes the shape outline, and the thick line becomes a separate curve. This feature can be useful when you want to keep only one part of the object.
By default, thick lines use the Thick Line style set, and thin lines use the Thin Line style set. Both style sets meet S1000D requirements. You can change the default style sets in the Options dialog box (Layout Document Options ). For more information about the Thick and Thin Line style sets, see Apply styles and style sets.
The thick and thin line drawing mode is typically used in line art and technical drawings so it doesn’t have fills. If you want to fill an object that has thick and thin lines, you can do so by using the controls on the property bar or in the Properties docker as you would with any other object. This method overrides the styles applied to the object. For information about overriding style attributes and reverting changes, see To override a style attribute. Alternatively, you can apply a fill by modifying the Thick and Thin Line style sets in the Object Styles docker. For rectangles, ellipses, and well shapes, modify the Thin Line style set; for cylinders, prisms, and threads, modify the Thick Line style set. Note, however, that editing the Thick and Thin line style sets will affect all objects using these styles.
With the exception of the Polygon and Star tools, all shape tools, including projected shape tools, support thick and thin line drawing.
Shapes drawn by using thick and thin lines
When you draw a curve, the thin line style is applied to the entire curve.
The Reverse line width button
(left) Original objects. (right) Thick and thin lines were applied to the objects.
The Reverse line width button
Applying thick and thin lines to a filled object removes the fill.
2 .
Click Object Break Thick/Thin Lines Apart .
To separate the thick lines from a shape, you can also right-click the shape in the Objects docker, and click Break Thick/Thin Lines Apart .
(left) A rectangle with thick and thin lines shown in the Objects docker. (right) The thick line is separated and becomes a curve that you can manipulate independently of the rectangle.
1 .
Click Layout Document Options .
2 .
In the Options dialog box, click Thick/Thin Lines .
The following style sets are available for both thick and thin lines: Thick Line , Medium Line , Thin Line , Center Line , and No Line . For more information about these style sets, Apply styles and style sets.
You can also create custom style sets and use them as defaults for thick and thin lines. For more information, see Create styles and style sets.
This site works best with JavaScript enabled

![]() Document Options). For more information about the Thick and Thin Line style sets, see Apply styles and style sets.
Document Options). For more information about the Thick and Thin Line style sets, see Apply styles and style sets. is not available for projected shapes such as cylinders, prisms, well shapes, and thread shapes.
is not available for projected shapes such as cylinders, prisms, well shapes, and thread shapes.