The Canvas Prep docker lets you prepare your photos and images for canvas printing in three steps. By resizing, fine-tuning, and stretching the image, you can achieve the perfect composition for your wall art.
First, you specify the print size by resizing the image proportionally. For best results, specify the smaller dimension first. For example, if you want your final print to be 8 by 10 inches and landscape orientation, set 8 for height. Leave the width value as is.
Second, you fine-tune the print size by trimming the image. You can specify the exact height or width, and then adjust the size in the image window. When printing to canvas and mounting on a profile, the trimmed image will constitute the face of the wall art.
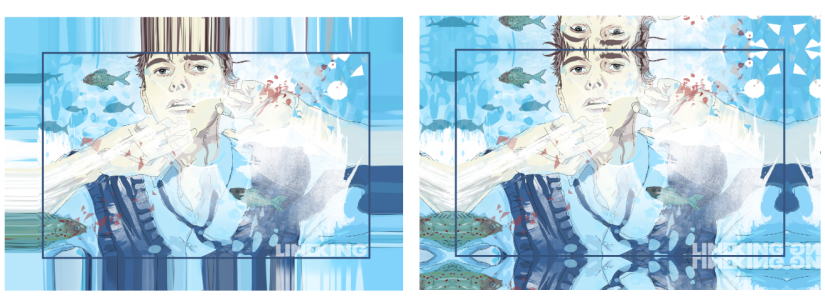
Third, you specify a stretch amount so that the image can be printed on canvas and mounted on a profile without losing important image detail. Stretching copies pixels from the image borders and adds them around the image. You can stretch an image by stretching or mirroring its edges. The stretched areas appear wrapped around the profile in the final output.
Stretching image edges (left) and mirroring image edges (right). The stretched areas, which lie outside the rectangle will appear wrapped around the profile in the final output. (Artwork by Dmitri Demidenko)
| 1 . |
Click Window  Dockers Canvas Prep. Dockers Canvas Prep. |
| 2 . |
Click the Resize image proportionally button  . . |
| 3 . |
In the Resize proportionally area, type the value you want in the Width or Height boxes, and click Resize. |
| 4 . |
Click the Trim image button  , and type the exact width and height value you want in the Width and Height boxes. A red overlay appears on the areas to be trimmed. , and type the exact width and height value you want in the Width and Height boxes. A red overlay appears on the areas to be trimmed. |
|
If necessary, click the Adjust image button  , and move the trimming rectangle to display the image elements you want to keep. , and move the trimming rectangle to display the image elements you want to keep. |
| 6 . |
Click the Stretch image button  , and then in the Stretch area, click one of the following buttons: , and then in the Stretch area, click one of the following buttons: |

The features documented in the Help are available in the full version of CorelDRAW Graphics Suite 2019. Some features may not be available in this version of the product.