Create objects
In Corel PHOTO-PAINT, you can create objects from
You can create objects from scratch by applying brushstrokes or creating shapes, or you can add brushstrokes and shapes to an existing object. For more information about applying brushstrokes and creating shapes, see Draw and paint.
You can also create an object by using an entire image background. The background cannot be edited or moved in the stacking order unless it is converted to an object.
Another way you can create an object is to define an editable area on an image background or another object. When you create an object from an editable area, you can include only the visible elements in that area. If an object is obscured by other objects, and you cannot see it, it will not be included in the editable area. For information about defining editable areas, see Define editable areas.
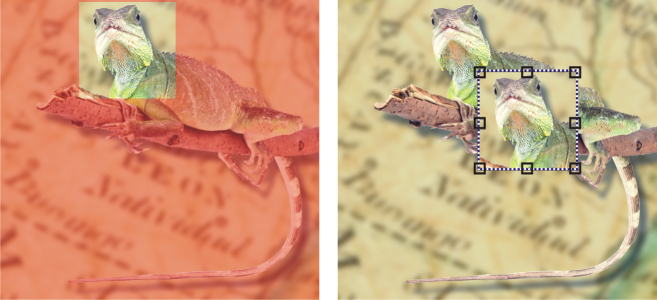
You can create an object by using part of an image background. Here, an editable area is defined and then the selection is copied, pasted, and moved.
All objects in an image have the same resolution and color mode. As you add objects to a file, the file size and memory requirements increase. To decrease file size, you can flatten an image by combining objects. For more information on combining objects, see Group and combine objects.
To retain objects when you save an image, you must save the image in the native Corel PHOTO-PAINT (CPT) file format. For more information on saving images, see Save images.
To create an object by using a brush tool
When the Show object marquee command in the Object menu is enabled, a dashed outline, called a marquee, surrounds the new object.
All brushstrokes and sprayed images are added to the active object by default.
You can also create an object by clicking the New object button ![]() in the Objects docker. If the Objects docker is not open, click Window
in the Objects docker. If the Objects docker is not open, click Window ![]() Dockers
Dockers ![]() Objects.
Objects.
To create an object by using a shape tool
When the Show object marquee command in the Object menu is enabled, a dashed outline, called a marquee, surrounds the new object.
To add a shape to the active object without creating a new object, disable the New object button ![]() on the property bar.
on the property bar.
To create an object by using the entire image background
To create an object by using an editable area
To remove the editable area of an image as you create an object, click Object ![]() Create
Create ![]() Cut from Mask.
Cut from Mask.