Pressure-sensitive pens and devices
The following tools in Corel PHOTO-PAINT let you use the pressure, tilt, bearing, and rotation of your pressure-sensitive pen or stylus: effects, touch-up, and paint tools as well as the Eraser tool. Note that you can use pen tilt and pen bearing only if your pen or stylus supports these features.
In addition, the liquid tools in Corel PHOTO-PAINT support pen pressure.
The pressure applied with the pen on a pen tablet determines the size, opacity, and other attributes of the brushstroke.
When you use a pressure-sensitive stylus or pen tablet, the amount of pressure that you apply controls your strokes. Each person uses a different strength or pressure level in a stroke, and you can set the application to match your stroke strength by specifying pen settings. Proper pen settings are particularly useful if you have a light touch. If a light stroke leaves no trace, adjusting pen settings can increase sensitivity for specific tools. Abrupt changes in the width your brushstrokes shows that you need to adjust your pen setting on the Pen Settings page in the Options dialog box. Pen settings can be saved as presets to use later.
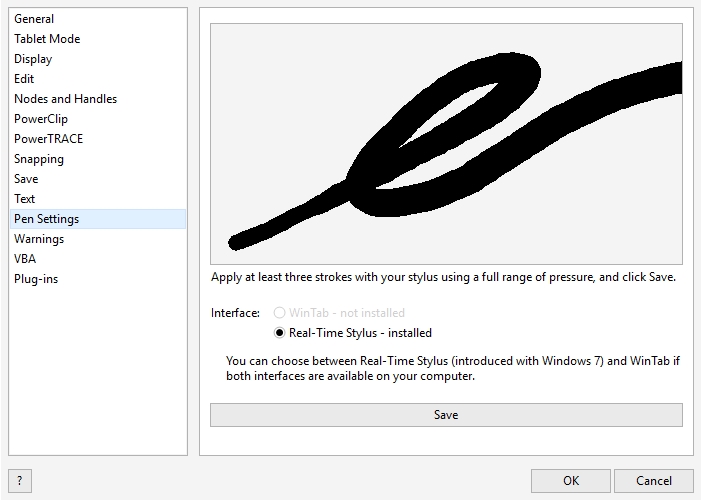
You can adjust pen settings to match your stroke strength.
Pen tilt can help you vary the flatness of the nib and other brush attributes. Pen bearing lets you use the direction in which the stylus is tilted to vary nib rotation and other brush attributes. Pen rotation lets you use the orientation of the stylus along its long axis to vary nib rotation and other brush attributes.
Real-Time Stylus (RTS) and WinTab
You can take full advantage of the pressure and tilt of your RTS-compatible pen tablet or device to control your brushstrokes. Corel PHOTO-PAINT includes support for the RTS interface. If you have a Wacom-compatible graphics tablet or device, you can still use the WinTab interface for optimal results.
You can assign a different tool to each pressure-sensitive pen and eraser available with the pen tablet. You can also set pen attributes such as pressure range, transparency, hue, saturation, lightness, bleed, and more. Some pressure-sensitive pen attributes are set in percentages; others are set in angles; size is set in pixels. Positive values increase a brush tool attribute as you add pressure to the pen, resulting in a more pronounced effect. Negative values make a brush tool attribute less pronounced as you add pressure.
The pressure-sensitive pen attributes can be saved for future use when you save a custom brush. For more information about custom brushes, see Custom brushes.
Enabling and disabling pen features
When you disable the pressure, tilt, bearing, and rotation of your pen or stylus they have no impact on the appearance of brushstrokes. Instead, the application uses fixed values to set brush attributes.

Controls from left to right: Pen pressure, Pen tilt, Pen bearing, and Pen rotation. You can access the pen controls from the property bar when using a brush tool that supports these features.
To adjust pen settings
To save the settings as a preset, click Save.
Corel PHOTO-PAINT automatically configures many pressure-sensitive pens.
To choose a pen tablet interface
To assign a tool to the eraser of a pressure-sensitive pen
To set the attributes of a pressure-sensitive pen or stylus
If your stylus or pen supports tilt, bearing, and rotation, these features can also help you vary brush attributes.
To enable or disable pen pressure
When enabled, pen pressure varies the size of the brush nib. The maximum size is set in the Nib size box on the property bar.
To enable or disable pen tilt
When enabled, pen tilt varies the flatness of the brush nib. You can specify a starting flatness value in the Nib properties section of the Brush Settings docker. For more information, see Nib properties.
To enable or disable pen bearing
When enabled, pen bearing varies the rotation of the brush nib. You can specify a starting angle of rotation in the Nib properties section of the Brush Settings docker. For more information, see Nib properties.
To enable or disable pen rotation
When enabled, pen rotation varies the rotation of the brush nib. You can specify the starting angle of rotation in the Nib properties section of the Brush Settings docker. For more information, see Nib properties.