| • | To apply a texture fill |
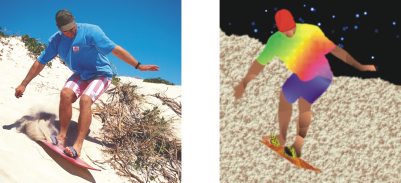
Texture fills are three-dimensional patterns. You can use existing texture fills, such as water, minerals, and clouds, or you can edit a texture to create your own texture fill. You cannot import files to use as texture fills.
When you edit a texture fill, you can modify its parameters, such as softness, density, brightness, and colors. Parameters vary for each texture. After you have edited a texture fill, you can save it for future use.
You can modify the attributes of a texture fill to change its appearance.
| To apply a texture fill |
|
| 1 . | In the toolbox, click the Fill tool |
| If you want to fill an object, you must select it by using the Object pick tool |
| 2 . | Click the Texture fill button |
| 3 . | Click the Edit fill button |
| 4 . | In the Edit fill dialog box, choose a texture library from the Texture library list box. |
| 5 . | Choose a texture from the Fill picker. |
| 6 . | Click where you want to apply the fill in the image. |
|
In the Edit fill dialog box, type values in the texture parameter boxes.
|
|
|
Click the Randomize button. Each time the button is clicked, random changes are made to unlocked parameters, and the modified texture is displayed in the Preview window.
|
|
|
Click Transformations, and click the Mirror tiles horizontally or the Mirror tiles vertically button.
|
|
|
Click Transformations, and type values in the Fill width and Fill height boxes.
|
|
|
Click Transformations, and type values in the X and Y boxes.
|
|
|
Click Transformations, and type a value in the Rotate box.
|
|
|
Click Transformations, and type a value in the Skew box.
|
|
|
Click Transformations, and click the Row offset or the Column offset button. Type a value in the % of tile box.
|
|
|
Click Options, and type a value in the Bitmap resolution box.
|
|
|
Click the Save texture button
|
|
|
Type a value in the Transparency box on the property bar. Higher values increase the transparency.
|
|
|
Type a value in the Tolerance box on the property bar. A value of 100 fills the entire object or area.
|
|
|
Choose a merge mode from the Merge mode list box on the property bar.
|
![]()
Not all suite components documented in this Help are available in our Trial, Academic, and OEM versions. Unavailable components may include Corel applications, product features, third-party utilities, and extra content files.
Copyright 2017 Corel Corporation. All rights reserved.