| • | To correct perspective distortions in photos |
| • | To correct perspective distortions interactively |
You can correct perspective distortions by using the Straighten image dialog box or interactively by using the Perspective Correction tool.
Correcting perspective distortions
Correcting perspective distortions interactively
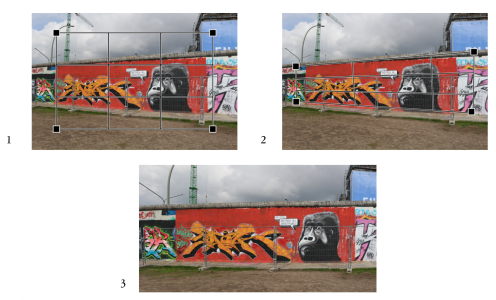
The Perspective Correction tool lets you fix perspective distortions by positioning a bounding box over the distorted elements. You must drag the handles of the bounding box to the corners of the image element that appears to be leaning or at an angle. If you need greater precision, you can move the handles of the bounding box by specifying their x and y coordinates. In addition, you can display grid lines in the bounding box. You can reset the bounding box by clearing any previous adjustments, and you can toggle the grid view.
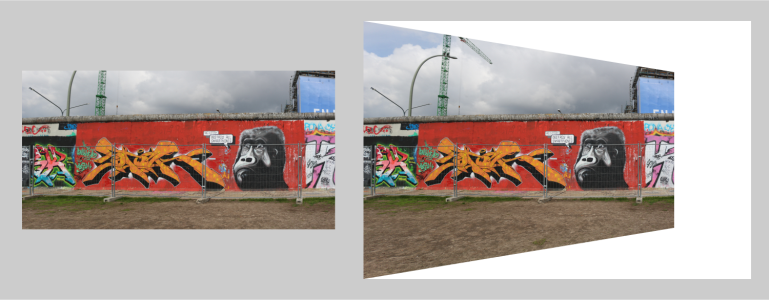
Final results with cropping enabled (left) and disabled (right).
| To correct perspective distortions in photos |
|
| 1 . | Click Adjust |
| 2 . | Perform a task from the following table. |
|
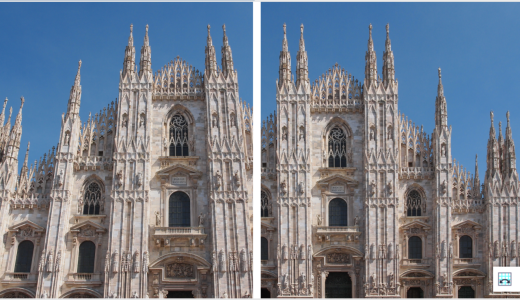
Move the Vertical perspective slider. If the photo object appears to be leaning backwards, move the slider to the left. Tall buildings in photos usually appear to be leaning back when the picture is taken from the ground.
|
|
|
Move the Horizontal perspective slider. If the photo was taken with the camera to the right of the object, move the slider to the left.
|
|
|
Enable the Crop check box, and then enable the Crop and resample to original size check box.
|
| To correct perspective distortions interactively |
|
| 1 . | In the toolbox, choose the Perspective Correction tool |
| A bounding box with corner handles appears on the image. |
| 2 . | Drag the handles to the corners of the image element that should be rectangular. |
| 3 . | Click Apply on the property bar. |
|
Click the Grid button
|
|
|
On the property bar, type values in the X and Y boxes for each handle.
|
|
|
Click the Crop button
Disabling the Crop button results in an image that appears skewed.
|
|
|
Click the Clear perspective correction button
|
The Perspective Correction tool cannot be used on 1-bit and 48-bit images.
You can select the Perspective Correction tool by pressing Shift+C.
You can also double-click the image to apply the perspective.
![]()
Not all suite components documented in this Help are available in our Trial, Academic, and OEM versions. Unavailable components may include Corel applications, product features, third-party utilities, and extra content files.
Copyright 2018 Corel Corporation. All rights reserved.