| • | To remove small dust and scratch marks throughout an image |
| • | To remove scratch marks from part of an image |
| • | To remove imperfections from an image by blending textures and colors |
Corel PHOTO-PAINT provides several different ways to improve the appearance of an image that has small dust and scratch marks. You can apply a filter to the entire image, or if an image has one or more scratches in a specific area, you can create a mask around the scratches and apply the filter to the editable areas.
The filter works by eliminating the contrast between pixels that exceed the contrast threshold you set. You can set a radius to determine how many pixels are affected by the changes. The settings you choose depend on the size of the blemish and the area surrounding it. For example, if you have a white scratch that is 1 or 2 pixels wide on a dark background, you can set a radius of 2 or 3 pixels and set the contrast threshold higher than if the same scratch were on a light background.
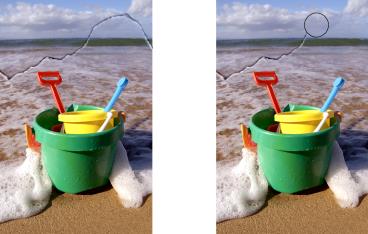
If the scratch or blemish is fairly large or in an area of the image that has a varied color and texture, such as leaves on a tree, you can achieve better results by cloning image areas. For information about cloning, see Cloning image areas.
| To remove small dust and scratch marks throughout an image |
|
| 1 . | Click Image |
| 2 . | Move the following sliders: |
| • | Radius — lets you set the range of pixels used to produce the effect. Set the radius as low as possible to retain image detail. |
| • | Threshold — lets you set the amount of noise reduction. Set the threshold as high as possible to retain image detail. |
You can remove small dust and scratch marks from an image by applying the Dust and scratch filter.
| To remove scratch marks from part of an image |
|
| 1 . | Define an editable area that includes the scratch marks. |
| 2 . | Click Image |
| 3 . | Move the following sliders: |
| • | Radius — lets you set the range of pixels used to produce the effect. Set the radius as low as possible to retain image detail. |
| • | Threshold — lets you set the amount of noise reduction. Set the threshold as high as possible to retain image detail. |
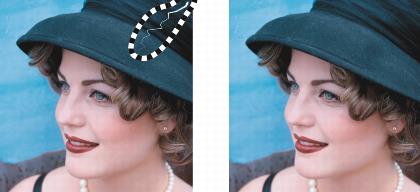
You can remove a scratch from a specific area by surrounding the scratch with a mask before applying the Dust and scratch filter. A dashed line or red-tinted overlay indicates the presence of a mask.
You can use the Brush mask tool ![]() to define an editable area that includes the scratch mark. Choose a nib size that is wider than the scratch mark so you can brush over the scratch easily. For information about the Brush mask tool, see To define an editable area by using the Freehand Mask tool.
to define an editable area that includes the scratch mark. Choose a nib size that is wider than the scratch mark so you can brush over the scratch easily. For information about the Brush mask tool, see To define an editable area by using the Freehand Mask tool.
Feathering the edge of the editable area can improve results by softening the transition between the repaired areas and the original image. For information about feathering, see To feather the edges of an object.
| To remove imperfections from an image by blending textures and colors |
|
| 1 . | In the toolbox, click the Touch-up brush tool |
| 2 . | Choose a nib from the Nib shape picker. |
| 3 . | Type a value in the Nib size box to specify the nib size. |
| 4 . | Choose an option from the Strength list box to set the intensity of the effect. |
| 5 . | Dab the brush in the image window to apply the effect. |
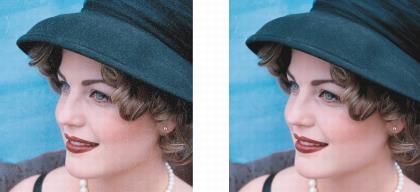
You can remove imperfections from an image by blending textures and colors with the Touch-up brush tool.
|
Click the Merged source button
|
|
|
Hold down Shift while dragging in the image window. Release the key when the nib is the size you want.
|
|
|
Hold down Alt, and click in the image window without releasing the mouse button to display a transparency slider.
|
|
|
Hold down Ctrl + Alt, and click in the image window without releasing the mouse button to display a feathering slider.
|
|
|
Click the Pen pressure button
|
You can use the Touch-up brush tool on images in the grayscale, duotone, Lab, RGB, and CMYK color modes.
You can quickly choose a square or round brush shape by clicking the Round nib button ![]() or the Square nib button
or the Square nib button ![]() on the property bar.
on the property bar.
Copyright 2015 Corel Corporation. All rights reserved.