| • | To create a brush dab shape |
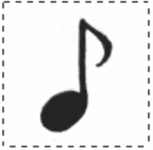
This musical note was captured as a brush dab.
| To create a brush dab shape |
|
| 1 . | On a white background, draw a shape in black color. |
| If you are drawing on a layer, drop the layer to the canvas when you complete the shape. (See To drop a layer.) |
| Use shades of gray to define the transparent areas of the dab. |
| To follow stroke direction, a captured brush set must face toward the right side. |
| 2 . | Choose the Rectangular Selection tool |
| 3 . | Drag across your brush shape to create a selection. For a square selection, hold down Shift after you start dragging. |
| 4 . | Click the Brush Selector on the Brush Selector bar. |
| 5 . | In the Brush library panel, choose the brush category in which you want to save the variant for the captured dab shape. |
| 6 . | Click the Brush library options button |
| 7 . | If necessary, choose Window |
| 8 . | Choose Select |
| If you like the results you’ve captured, you can save the brush as a new variant. For information about how to save customized brushes for later use, see Saving and deleting brush variants. |
You can paint with a captured brush just as you would with other brushes.