| • | To create an embossed effect |
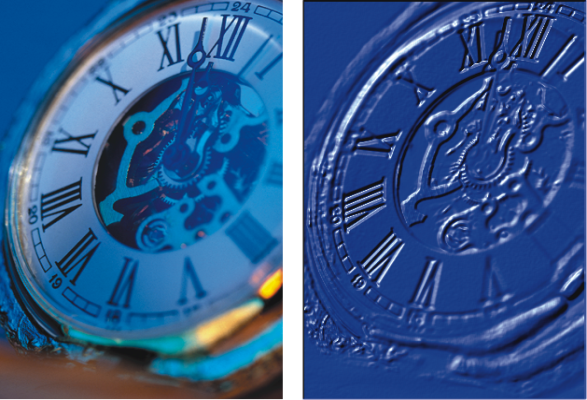
Before (left) and after (right) applying the embossed effect
| To create an embossed effect |
|
| 1 . | Open an image. |
| 2 . | Choose File |
| 3 . | Choose a color other than black from the Colors or Color Sets panel. |
| If you want the embossed image to be white, select all, and then press Delete (macOS) or Backspace (Windows). |
| 4 . | Choose Edit |
| 5 . | In the Fill dialog box, choose Current Color from the Fill with list box. |
| 6 . | Adjust the Opacity slider to set the opacity of the fill. |
| 7 . | Click OK to fill the clone file with color. |
| 8 . | Choose Effects |
| 9 . | Choose Original Luminance from the Using list box. |
| The preview window shows how the embossed image will look. |
| 10 . | In the Light Controls area, adjust any of the following sliders: |
| • | Brightness — controls the light intensity |
| • | Concentration— adjusts the spread of the light’s shine over the surface |
| • | Exposure — adjusts the overall lighting amount from darkest to brightest |
| 11 . | Enable the Simple lighting check box, and click a light indicator on the sphere to change the location of highlights and shadows. |
| If you want to change the light color, click the Light Color chip, and choose a color from the color picker. |