Quick links to procedures on this page:
Corel Painter offers two different methods for adjusting image brightness and contrast. You can adjust brightness and contrast more quickly by using the Brightness/Contrast effect, or more precisely by using the curve in the Color Correction dialog box.
When using the Brightness/Contrast effect, you can adjust all image colors at once.
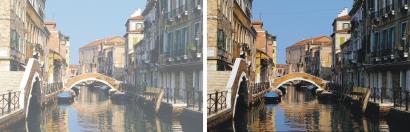
Before (left) and after (right) applying the Brightness/Contrast effect.
When using the curve, you can adjust the contrast or brightness of colors while maintaining the tonal transitions in the original image. You can adjust all colors at once, or adjust R, G, and B individually. As you adjust the Contrast or Brightness sliders, the endpoints of the curves remain fixed. Because the effect maintains the levels from the original image, there are always 256 distinct levels, regardless of how much you adjust the sliders.
Contrast adjusts the difference between light and dark values. As you increase the contrast, the curve takes on an "S" shape, indicating that light colors are becoming lighter and dark colors darker. If you decrease the contrast, the curve takes on an inverted "S" shape and tones down the contrast of all midtone colors.
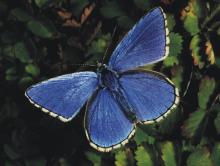
An image before adjusting brightness and contrast by using the curve.

An example of increasing the contrast by using the curve.
Brightness moves all values on a curve to a brighter tone or darker tone.
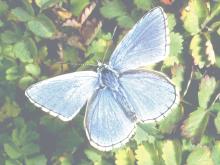
An example of increasing brightness by using the curve.
|
2
|
Choose Effects  Tonal Control Brightness/Contrast. Tonal Control Brightness/Contrast. |
|
3
|
Move the Brightness slider to adjust image brightness. |
|
4
|
Move the Contrast slider to adjust image contrast. |

You can reset the sliders to the default settings by clicking Reset.
You can compare the adjusted image with the original image by enabling and disabling the Preview check box.
|
1
|
Choose Effects Tonal Control Correct Colors. |
|
2
|
In the Color Correction dialog box, choose Curve from the Method list box. |
|
• |
Red — allows you to adjust only the red curve |
|
• |
Green — allows you to adjust only the green curve |
|
• |
Blue — allows you to adjust only the blue curve |
|
• |
Master — allows you to adjust all color curves at once |
|
• |
Brightness — lets you brighten or darken the selected color(s). This control can correct exposure problems caused by too much light (overexposure) or too little light (underexposure). |
|
• |
Contrast — increases or decreases the difference in tone between the dark and light areas of an image |

Channel icons in the Color Correction dialog box.
You can clear all corrections so that you can start again by clicking Reset.
You can compare the adjusted image with the original image by enabling and disabling the Preview check box.
Copyright 2014 Corel Corporation. All rights reserved.