| • | To edit a gradient interactively |
| • | To edit a gradient preset |
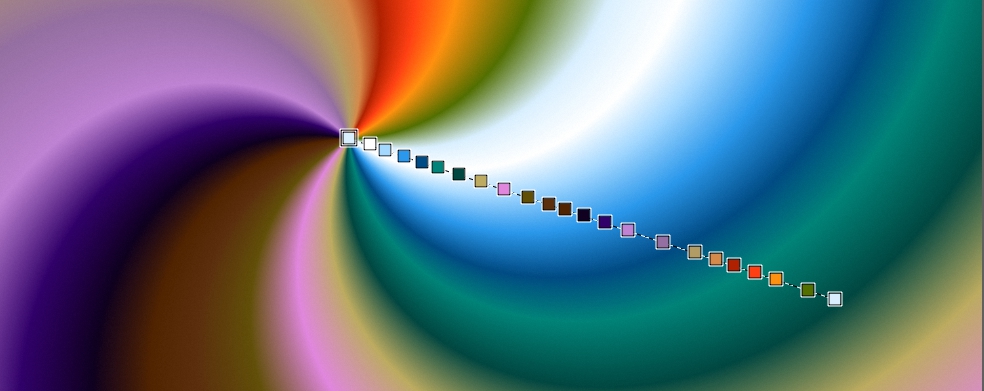
After you draw a gradient with the Interactive Gradient tool, you can edit it in the document window. An interactive gradient control appears, which marks the transition from one color to another. The direction and size of the gradient depend on where you first click in the document window, the distance that you drag, and the direction in which you drag. Each color in the gradient fill is represented by a square node on the interactive gradient control. You can modify the gradient appearance by repositioning nodes, adding and removing nodes, and changing the color of nodes.
| To edit a gradient interactively |
|
| 1 | Click the Interactive Gradient tool  in the toolbox. in the toolbox. |
| 2 | Click the Gradient Selector  on the property bar, and choose a preset. on the property bar, and choose a preset. |
| Make sure the Edit nodes option on the property bar is enabled. |
| 3 | Draw a gradient. |
| 4 | Perform a task from the following table. |
| To edit a gradient preset |
|
| 1 | In the Gradient Libraries panel (Window |
| 2 | Click the Edit Gradient  button. button. |
| 3 | In the Edit Gradient dialog box, perform a task from the following table. |
|
Click in the color ramp bar where you want to add a color. In the Color panel (Window
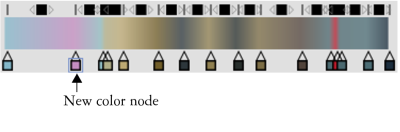 A new color was added to the gradient by adding a node to the color ramp bar. |
||||||||||
|
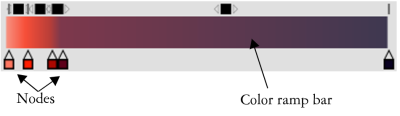
Click a node in the color ramp bar, and click Delete Node.
 |
||||||||||
|
Click a node in the color ramp bar and move the Opacity slider.
|
||||||||||
|
Disable the Linear check box and drag the Color Spread slider to control the color smoothness at each node.
|
||||||||||
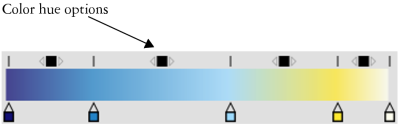 The Color hue options allow you to change the hue of the blend within that segment. Select one of the following options in the Color Blend Method area:
Tip: To understand this concept better, refer to the standard display of the Color panel (Hue Ring and Saturation/Value Triangle), and note the order of the colors on the Hue Ring.
|
||||||||||
|
Press Option + click (macOS) or Alt + click (Windows) in the color ramp bar.
|
| 4 | In the Gradients panel (Window  , and choose Save Gradient. , and choose Save Gradient. |
| 5 | In the Save Gradient dialog box, enter a name for the gradient. |
|
Click the Gradients panel toggle button
 on the extended property bar (Window on the extended property bar (Window  button, and do any of the following: button, and do any of the following:
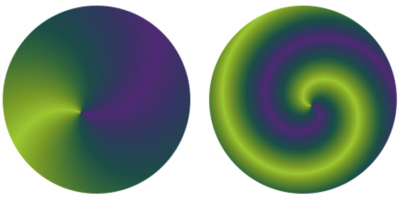 A gradient with low spiral tension (left) and high spiral tension (right) |
|||||||
|
Drag the Set the Angle of the Ramp slider
 in the Gradients panel or type an angle in the corresponding numeric value box. in the Gradients panel or type an angle in the corresponding numeric value box. |
Copyright 2017 Corel Corporation. All rights reserved.
 on the property bar.
 on the extended property bar (
 to the right or left to increase or decrease the spiral tension.
 .
.