Corel Painter Help :
Dynamic Plug-ins : Applying the Glass Distortion dynamic plug-in
Quick links to procedures on this page:
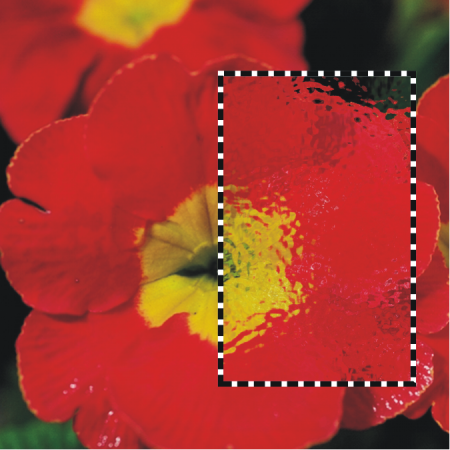
The Glass Distortion dynamic plug-in creates a layer that simulates the appearance of viewing the image through textured glass. You can move the layer in the document to view the distortion over different parts of an image.
A section of an image with Glass Distortion applied
|
• |
In the Layers panel, choose the Canvas. |
|
2
|
In the Layers panel, click the Dynamic Plug-ins button  , and choose Glass Distortion. , and choose Glass Distortion. |
|
3
|
In the Glass Distortion Options dialog box, choose one of the following displacement sources from the Using list box: |
|
• |
Paper — uses the selected paper texture. Paper texture is good for creating the pebbled glass effect. Unless you want frosted glass, you’ll probably want to increase the scale of the paper. |
|
• |
Softness — controls the transitions between displaced colors. Increasing softness creates more intermediate steps and produces a smoother distortion. If you experience aliasing in a glass distortion, try increasing the softness. |
|
• |
Amount — controls the degree of displacement. A higher amount leads to more distortion. |
|
• |
Variance — creates multiple variations in the neighborhood of the displacement. The result of increasing variance depends on the type of image and other settings. |

You can also use the Opacity slider in the Layers panel to adjust the effect.
You can drag the Glass Distortion layer or selection in the document window to distort other areas of the image.
The Glass Distortion dynamic layer using Paper (left) and Image Luminance (right) displacement sources
Copyright 2017 Corel Corporation. All rights reserved.

 , and choose Glass Distortion.