Auto-painting photos
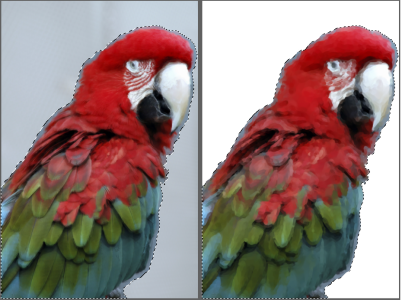
After the photo is cloned, you can start the auto-painting process.
Auto-painting applies brushstrokes to the canvas.
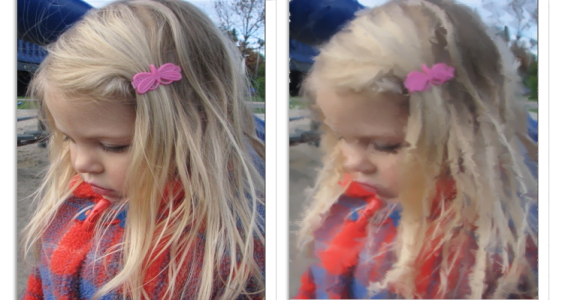
If you want to isolate an area for auto-painting, you can create a selection first. In the final result, the areas protected by the selection are filled with the canvas color. For information about selections, see Selections and transformations.
Auto-painting using a selection
You can control the speed of auto-painting so that you can see how and where individual strokes are applied. You can also stop the auto-painting process at any time.
Smart Stroke painting
You can choose a Smart Stroke brush variant and let the Smart Stroke painting and settings do the work. Although the Smart Stroke brush variants are optimized for auto-painting, you can also use any Cloner brush variant. You can choose from the following options:
•
Smart Stroke Painting — automatically applies paint strokes that follow forms in the photo
•
Smart Settings — changes the size, length, and pressure of brushstrokes in areas of greater detail. This option can be used with Smart Stroke painting to preserve detail from the source photo.
Customizing stroke settings
If you want more control over how the brushstrokes interact with the canvas, you can set individual stroke settings as follows:
•
Stroke — lets you choose a brushstroke. You can also add custom brushstrokes to the list.
•
Randomness — introduces an "accidental" quality in color and stroke.
Randomness contributes to the appealing, unique look of artwork created with Corel Painter. You can control the randomness of the following settings:
•
Pressure — lets you set a value from 0 to 100 to specify the amount of pressure with which brushstrokes are applied. This setting represents the percentage of the preset pressure for the
Stroke option.
•
Length — lets you set a value from 0 to 100 to specify the length of the brushstrokes. This setting represents the percentage of the preset length for the Stroke option.
•
Rotation — lets you set a value from 0 to 360 degrees to specify the rotation of the brushstrokes.
•
Brush Size — lets you set the brush size
You can also record a custom brushstroke.
To auto-paint a photo by using Smart Stroke painting

1
Select the clone document in the application window.
If you want to auto-paint only specific areas in a photo, click a selection tool in the toolbox, and create a selection.
2
In the Brush Selector, choose the
Smart Strokes brush category, and choose a brush variant.
Note: You can also use any variant in the
Cloners categories.
3
In the
Auto-Painting panel (
Window  Photo Art Panels Auto-Painting
), enable the
Smart Stroke Painting check box.
You can turn off tracing paper to view the auto-painting progression by pressing
Command + T (macOS) or
Ctrl + T (Windows).
4
Click the
Play button

.
Brushstrokes are applied automatically.
5
Click the
Stop button

when you are satisfied with the results.
If you do not click the
Stop button, auto-painting stops at the end of the brushstroke cycle.
|
|
|
Set paint strokes to adjust automatically in size, length, and pressure to areas of greater detail |
Enable the Smart Settings check box. |
Control the speed at which brushstrokes are applied |
|

If only a solid color is used for painting, undo the auto-painting, and make sure that the Clone Color button  in the Color panel is enabled.
To auto-paint a photo by using a custom stroke
1
Select the clone document in the application window.
If you want to auto-paint only specific areas in a photo, click a selection tool in the toolbox, and create a selection.
2
In the Brush Selector, choose a
Cloners brush category, and choose a brush variant.
3
In the
Auto-Painting panel, choose a stroke from the
Stroke list box.
You can turn off tracing paper to view the auto-painting progression by pressing
Command + T (macOS) or
Ctrl + T (Windows).
4
Click the
Play button
.
Brushstrokes are applied automatically.
5
Click the
Stop button
when you are satisfied with the results.
If you do not click the
Stop button, auto-painting stops at the end of the brushstroke cycle.
|
|
|
|
|
Move the Randomness slider. The settings in the slider determine the range of randomness for Pressure, Length, and Rotation. For example, if the Randomness for pressure slider is set to 32% and the Randomness slider is set to 64%, the pressure for each stroke is between 0% and 32% with a variation of 64%. |
Vary the pressure of the brushstrokes |
Click the Randomness for pressure  button, and then move the slider. |
Vary the length of the brushstrokes |
Click the Randomness for length button, and then move the slider. |
Vary the rotation of the brushstrokes |
Click the Randomness for rotation button, and then move the slider. |
Change the size of the brushstrokes |
Move the Brush Size slider. |
Control the speed at which brushstrokes are applied |
|
You can use a custom stroke by clicking the Recording Options button and choosing Record Stroke. Paint a stroke on the canvas, and choose Save Stroke from the same menu. Your stroke is added to the Stroke list box. For more information, see Recording and playing back brushstrokes.