Creating a nozzle from a movie
On the Windows operating system, Corel Painter lets you create an Image hose nozzle from a movie. This allows you to transform each frame of a Corel Painter movie into Image hose imagery. The frame size describes the item size. If you’re creating a movie just to turn it into a nozzle, set the frame size just large enough to hold your largest image element. You can use the selection in each frame to control the shape of the images.
The Make Nozzle From Movie command automatically creates a 1-Rank nozzle. If you want, you can use this technique to create a 2-Rank nozzle.
To make a nozzle file from a movie
To make a 2-Rank nozzle from a movie
The frame size (canvas width and height) should be just large enough to hold your largest image element.
The total number of frames must equal the number of elements in Rank 1 multiplied by the number of elements in Rank 2. For example, for a 2-rank nozzle with three items in Rank 1 and three items in Rank 2, the movie needs to contain nine frames.
2
Add an image element to the first frame. You can add image elements by using selections or layers.
4
Move to the second frame, and add an image element. Edit the image element if necessary, and repeat step 3 before moving to the next frame.
5
Continue adding image elements to the remaining frames. Make sure to apply the Drop and Select command before moving to a new frame.
You need to arrange image elements in sets according to the second rank. In the following example, the second rank progression for the new nozzle is changing color. The movie is organized in three color sets. Frames 1 to 3 form the red set; frames 4 to 6, the green set, and frames 7 to 9, the yellow set. Each set is the first rank progression (changing angle) for the new nozzle and contains images that are the same color but are placed at a different angle.
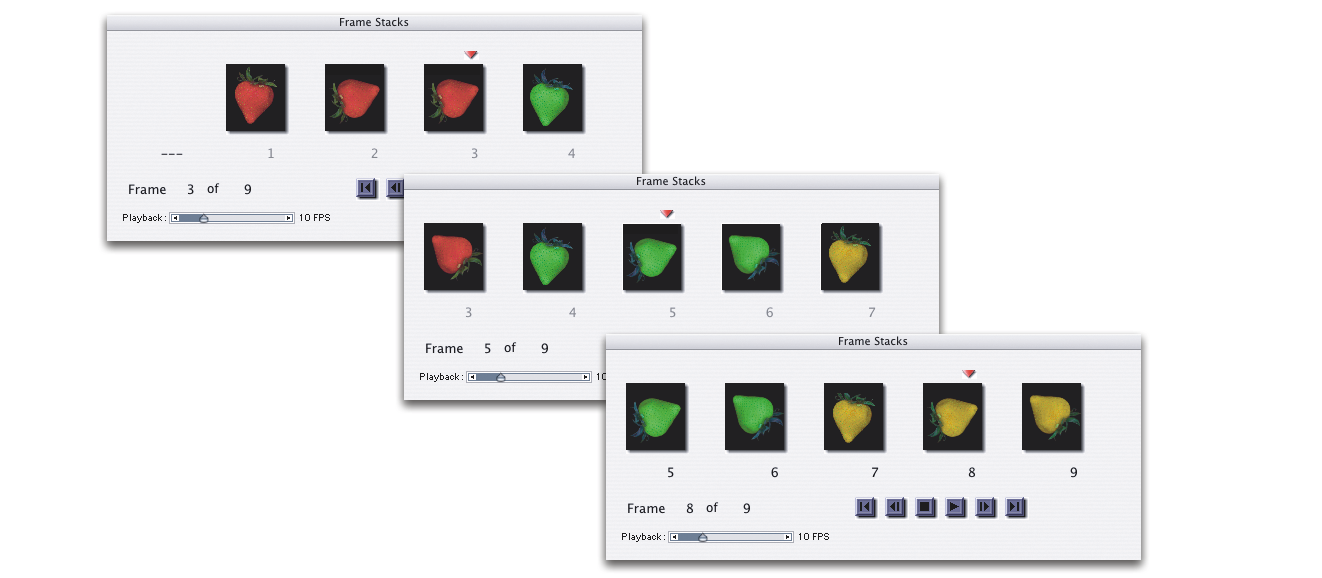
The image elements in this movie are arranged in color sets according to the second rank.
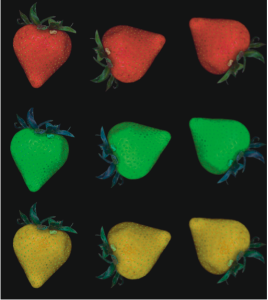
The resulting nozzle file from the movie in the previous example
For example, the statement "Image hose 9 items" describes a 1-Rank nozzle with nine image elements. To describe a 2-Rank nozzle with three items in Rank 1 and three items in Rank 2, you need to change the statement to "Image hose 3 by 3 items."
To paint with the new nozzle file, you need to load it first. For more information, see To load a 2-Rank or 3-Rank nozzle file.