Creating documents
To start an image from a blank canvas, you must create a new document. This allows you to specify canvas settings, such as width, height, orientation, and resolution. The size of the canvas determines the size of the image when it is printed. When you create a new document, first set the resolution, and then specify the width and the height. Increasing or decreasing the resolution affects the document size in inches, however, the total number of pixels in the image remains constant. For more information about resolution, see Understanding resolution. To quickly get started, you can choose from a list of preset canvas settings. However, you can also specify custom settings, which you can save as a preset for future use. You can specify the canvas color and texture. If you are planning to paint with a Thick Paint, Watercolor, or Liquid Ink brush, you can create the layer type you need and set canvas visibility right in the New Image dialog box.
You can also assign an RGB color profile to your document. For more information about color profiles, see Color management.
When you set the canvas size, choose options that correspond to the image’s destination. If you plan to print your work, the canvas dimensions determine the size of your artwork when it is printed. Consider the largest size at which you plan to print your artwork, as well as any smaller copies that you may need.
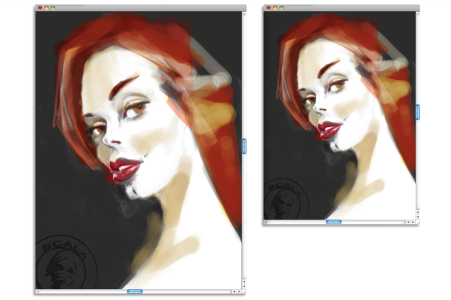
You can resize the canvas (left) to prepare an image for printing (right).
It is always better to start with a bigger canvas, because you can decrease the width and height of your image at any point without affecting its quality. A large size makes it easier to preserve image detail if you need to produce a smaller version of the image. However, if you start with a smaller image and then increase the image dimensions, the application inserts new pixels between existing pixels, and their colors are based on the colors of adjacent pixels. If you increase image dimensions significantly, images may appear stretched and pixelated.
When choosing a canvas size, make sure your document has the proper aspect ratio that will allow you to print to common canvas and paper sizes without cropping your artwork (for example, 8 in by 10 in, 11 in by 14 in, 16 in by 20 in, 18 in by 24 in, etc.).
For example, you can set the resolution of a new image at 300 pixels per inch (ppi), the width to 16 inches, and the height to 24 inches. This large size makes it easier to maintain image quality when you need to produce a smaller version of the image.
Note that the bigger the canvas size and resolution, the more pixels there are in a brushstroke, and the harder it may become for your computer to process it. To ensure optimal brush and application performance, experiment to find the largest canvas dimensions that work best for your painting and for your software and hardware configuration.
For information about resizing images, Resizing images and the canvas.
Pixels-per-inch (ppi) is equivalent to dots per inch (dpi).
The maximum canvas size is 16 382 x 16 382 pixels. To prevent performance issues, start with a canvas that is smaller than 16 382 x 16 382 because layers expand when paint and effects are applied close to their edges.
To create a new document
In the New Image dialog box, setting the document’s pixels-per-inch is equivalent to setting its dots per inch (dpi). For more information, see Understanding resolution.
To create a custom canvas preset
A custom canvas preset is not a template. Unlike a template, it does not allow you to store any content. A custom canvas preset allows you to store only canvas dimensions, resolution, color, and texture.
You can delete a canvas preset by choosing the preset name from the Canvas Preset list box and clicking the Delete button ![]() .
.