Creating pixel-based selections
Corel Painter offers various methods for making pixel-based selections. The Magic Wand tool  selects groups of pixels according to color. You can adjust the settings to control the range of colors, and you can also choose to include only adjacent colors (contiguous) or only nonadjacent colors (noncontiguous).
In addition, there are ways to auto-generate pixel-based selections by using various image, clone, and color characteristics. For example, you can create a selection based on the luminance values of a clone.
Pixel-based selections provide 256 levels of protection to the canvas. Each pixel in the selection sets a level of protection for its corresponding color pixel in the RGB image. Opaque areas of the selection provide 100% protection and prevent brushstrokes and effects from marking the canvas. Clear areas of the selection provide no protection and allow brushstrokes and effects to mark the canvas. Brushstrokes and effects are partially applied to areas where the selection is shaded or semitransparent. As a result, you can paint and apply effects with varying levels of intensity within a selection.
You can move pixel-based selections, but you cannot resize or rotate them. To apply transformations to pixel-based selections, convert any pixel-based selections into path-based selections. For more information, see To convert a pixel-based selection to a path-based selection.
To select an area by using the Magic Wand tool

1
In the toolbox, click the
Magic Wand tool

.
2
On the property bar, adjust the
Tolerance slider to control the amount of variance allowed from the selected color with higher values creating a larger range of colors.
3
In the document window, do one of the following:
•
Click to select the color in the middle of the range of colors that you want to use for the selection.
•
Click and drag over an area to define the range of colors that you want to use for the selection.
It may take a moment for the selection to be calculated and loaded.
|
|
|
Create a selection with contiguous pixels |
On the property bar, click the Contiguous button. |
|
|
On the property bar, click the New Selection button  and click in the document window. |
Add to the current selection |
On the property bar, click the Add To Selection button  and click the areas you want to add. |
Remove an area from the current selection |
On the property bar, click the Subtract From Selection button  and click the areas you want to add. |

The default tolerance for selections is 32. This can be adjusted from 1 to 255.
If you add to the current selection, you add to the range of values that the Magic Wand tool selects rather than create an additional selection with a unique seed color.

You can restrict a selection to a rectangular area by pressing Option + Shift (macOS) or Alt + Shift (Windows), and dragging a bounding rectangle in your image.
You can restore the default settings by clicking the Reset Tool button  on the property bar.
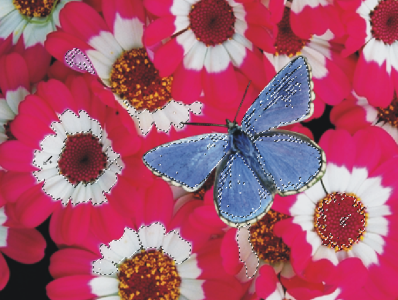
Adding to a selection by using the Magic Wand tool
To auto-generate a selection based on image characteristics

1
Choose
Select  Auto Select
.
2
From the
Using list box, choose one of the following options:
•
Paper — creates a selection by using the current paper texture
•
Image Luminance — creates a selection based on the light and dark areas of the current image
•
Current Color — creates a selection of pixels based on the current main color. Before using this option, you can pick a color from the image by using the
Dropper tool

.
If you want to invert the selection, enable the
Invert check box.
To auto-generate a selection based on clone characteristics

1
Open or create an image.
2
In the
Clone Source panel (
Window  Clone Source
), choose
Embedded Image from the
Source list box. In the
Embed Source Image dialog box, do one of the following:
•
To browse for a file, enable the
Browse option.
•
To clone a currently open document, enable the
Current Document option, and choose a document from the list box.
•
To embed the active texture, enable the
Current Texture option.
3
Choose
Select  Auto Select
.
4
From the
Using list box, choose one of the following:
•
3D Brush Strokes — creates a selection that is based on the difference between the current image and the clone source. If no clone source is selected, the current pattern is used.
•
Original Luminance — produces a selection in the current document based on the light and dark areas of the clone source. If no clone source is selected, the current pattern is used.
If you want to invert the selection, enable the
Invert check box.
To auto-generate a color-based selection

1
Choose
Select  Color Select
.
2
Click in the document window to pick a color.
3
In the
Color Select dialog box, move the
Range sliders in the
Hue,
Saturation, and
Value areas.
These sliders control the selected range of colors.
4
Move the
Feather sliders in the
Hue,
Saturation, and
Value areas.
Feathering helps soften the selection edge.
5
The
Preview window shows the selected area as a red overlay on the image. Drag in the
Preview window to see other parts of the document.
selects groups of pixels according to color. You can adjust the settings to control the range of colors, and you can also choose to include only adjacent colors (contiguous) or only nonadjacent colors (noncontiguous).
on the property bar.
