Creating reflection maps
A reflection map is an image that is mapped onto a texture to produce the illusion that it’s reflecting light from the surrounding environment. You can use either a pattern or a clone source image as a reflection map. Choosing a pattern allows you to quickly apply a realistic reflection. Reflection maps are useful to create the appearance of chrome or polished metal.
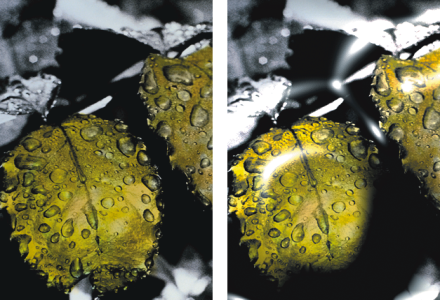
Before (left) and after (right) applying a typical reflection map
You can control how much of the image appears in the texture. If you add a reflection map to a clone, the clone source is mapped onto the texture. Otherwise, Corel Painter uses the current pattern as the reflection map.
You can use the Image Warp effect to approximate the reflection from a curved surface. For more information, see Applying a warp effect.
To create a reflection map from a clone source

1
Open an image or create a new image to use as the reflection.
If you want to approximate the reflection from a curved surface, apply the
Image Warp effect.
2
Choose
File  Clone
Clone.
3
Click a selection tool from the toolbox, and select the area that you want to be reflective.
4
In the toolbox, click the
Selection Adjuster tool

.
5
Right-click the selection and choose
Layer Via Copy.
6
In the
Layers panel, click the
Canvas, and then select the layer you just created.
7
Click the
New Layer Mask button

.
Using a layer mask simplifies the process because the layer mask exactly matches the shape of the reflection area. For more information, see
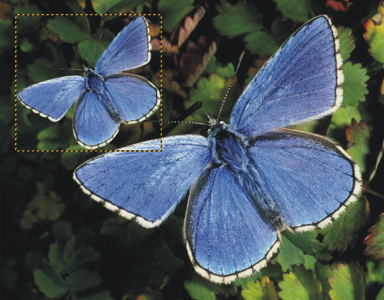
Creating and deleting layer masks.A selected image area, ready to become reflective
8
Choose
Effects  Surface Control
  Apply Surface Texture
.
9
Choose the layer mask from the
Using list box.
10
Move the
Reflection slider to adjust the amount of reflection you want.
11
Move the
Softness slider to adjust the mapping from the edges of the layer’s image.
Increasing softness gives a rounder, more 3D look to the surface.
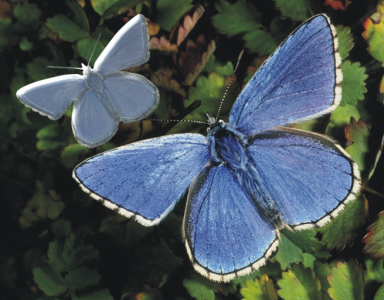
The resulting chrome-plated butterfly


