Stroking and filling a selection with mosaic tiles
You can stroke or fill path-based selections that were created with the Rectangular Selection, Oval Selection, and Lasso tools with mosaic tiles. If you want to stroke or fill a channel-based selection with mosaic tiles, you need to use the Transform Selection command to convert a channel-based selection to a path-based selection. For more information, see Getting started with selections.
Stroking and filling a selection are appropriate only when you change a parameter between operations — for example, if you change the tile color or dimensions. The Stroke Selection command applies a single row of tiles as an outline along the selection path. To fill an entire selection with tiles, you can make the selection using the Lasso tool. To fill an oval or rectangular selection, you must first use the Stroke Selection command to apply tiles to the selection path, and then use the Fill Selection command to fill the rest of the selection.
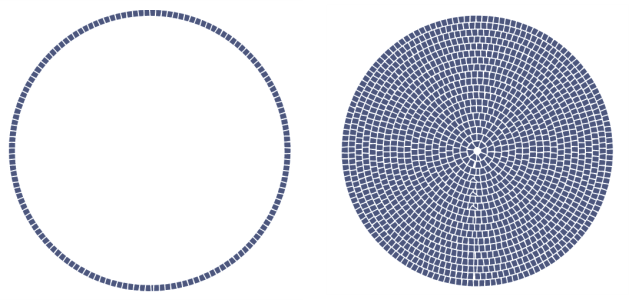
To fill an oval or rectangular selection, you must first use the Stroke Selection command to apply tiles to the selection path (left), and then use the Fill Selection command to fill the rest of the selection (right).
To create a mosaic in a selection
In some cases, Corel Painter might not put a tile in every space. You can fill openings by choosing Apply Tiles from the Action list box and applying the tiles.
If you want to change the tiling of an area, you can use the Remove Tiles action to clear it. Then you can reapply tiles.