Applying the Kaleidoscope dynamic plug-in
The Kaleidoscope dynamic plug-in creates a square layer that produces kaleidoscopic effects from underlying images. The traditional kaleidoscope is a hollow tube with a set of mirrors and colored chips at one end. You peer into the other end and enjoy the highly symmetrical patterns that the mirrors create from the colored chips. When you add a Kaleidoscope dynamic layer, you first specify its size. You can move the layer over different parts of an image to produce different effects.
To create a Kaleidoscope dynamic layer
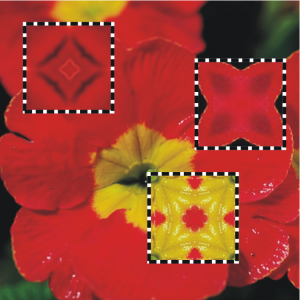
Move the Kaleidoscope layer to produce different effects.
To preserve the Kaleidoscope layer, you need to save the image in RIFF format.
To create and capture a Kaleidoscope pattern
When you create a pattern from a Kaleidoscope layer, the selection is dropped to the canvas and cut out. If you want to preserve the original image and the Kaleidoscope layer so that you can continue working with the effect, save the image in RIFF format before you choose Drop and Select. As an alternative, you can set the number of Undo levels high enough so that you can back out of the steps to restore the original image.