Working with embedded clone sources
When you embed a clone source, it is saved with your document for future use. The embedded image is best described as a snapshot of a selected image or texture at a given time. Once a copy of the source clone is embedded into the document, the relationship with the original image or texture is broken. However, you can edit the embedded image to change its appearance. For example, you can add layers or apply effects to the source image. When the source image modifications are complete, you have various options for working with the edited image.
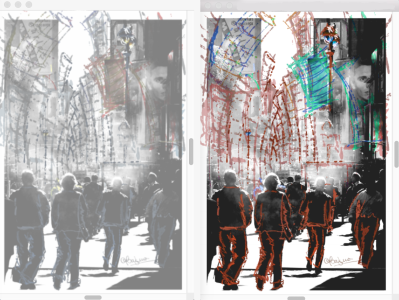
The Adjust Colors effect was applied to the source image (right). However, the edit is not yet reflected in the embedded clone source image (left). Artwork (left) by Claudia Salguero.
You can save the changes to the source image by updating the currently selected clone source, or by creating a new image from the edited source. You can also discard any changes that you make to the embedded source image. It’s important to note that if you choose to update the active clone source or create a new clone source, all layers will be merged and the undo levels will be lost. If you want to retain the layers, export the source image as a new document and then update the embedded source image to continue cloning. Once the source image is exported as a new document, the relationship with the embedded source image is broken.
You can switch between embedded clone sources as you work on your composite image.
To edit an embedded clone source image
After you make changes to the clone source image in the Source Image window, you can also export it by pressing Command + Shift + S (macOS) or Ctrl + Shift + S (Windows).