Quick links to procedures on this page:
You can edit an embedded clone source image to change its appearance. For example, you can add layers or apply effects to the source image. When the source image modifications are complete, you have various options for working with the edited source image.
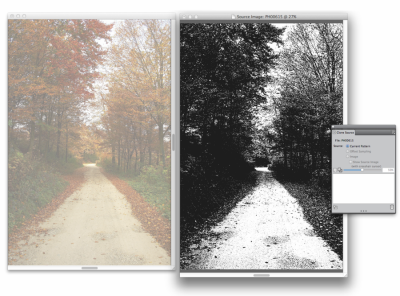
A black and white effect was applied to the Source Image (right). However, the edit is not yet reflected in the embedded clone source image (left).
You can save the changes to the source image by updating the currently selected source image, or by creating a new source image from the edited source. It’s important to note that performing either of these actions flattens all layers and deletes all undo levels from the image. If you want to retain the layers, you can export the source image as a new document and then update the embedded source image to continue cloning. Once the source image is exported as a new document, the relationship with the embedded source image is broken.
You can also discard any changes that you make to embedded source image.
|
2
|
In the Clone Source panel, enable the Show Source Image check box. |
|
4
|
The Edit Source Image dialog box opens to provide instructions on how to proceed after editing a source image. Click OK. |
|
5
|
In Source Image window, edit the source image. |
|
The Clone Source Image dialog box appears. |
|
2
|
In the Clone Source Image dialog box, enable the Update option. |
|
The Clone Source Image dialog box appears. |
|
2
|
In the Clone Source Image dialog box, enable the Create New option. |
|
2
|
In the Export Source Image As dialog box, choose the drive and folder where you want to save the file. |

You can also export a clone source image by pressing Command + Shift + S (Mac) or Ctrl + Shift + S (Windows).
|
The Clone Source Image dialog box appears. |
|
2
|
In the Clone Source Image dialog box, enable the Discard option. |
Copyright 2016 Corel Corporation. All rights reserved.
