Cutting out image areas
You can use the Object Extractor to cut out an image area from the surrounding background. You can then edit the cutout separately from the background, display it against a different background, or combine it with other images.
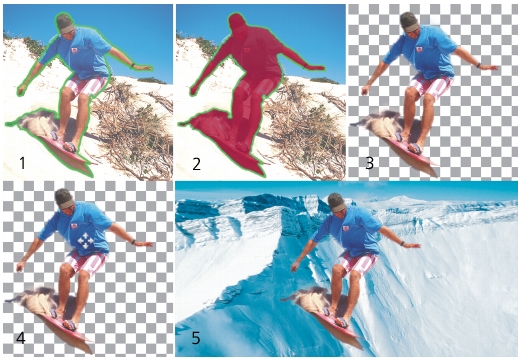
Object Extractor workflow: (1) Outline the edges of the image area; (2) add a fill; (3) preview the cutout, and touch it up if necessary; (4) bring the cutout into the image window; (5) place the cutout against a different background image (optional).
| To cut out an image area |
Edit workspace
1 |
On the Layers palette, click the layer that contains the image area
that you want to cut out.
|
2 |
Choose Image |
The Object Extractor dialog box appears, with the Brush tool |
3 |
Adjust the brush size by moving the Brush size slider.
|
4 |
In the preview area, draw a line along the edges of the image area
that you want to cut out.
|
Ensure that the selection outline slightly overlaps the surrounding background and completely surrounds the area in a closed ring. |
5 |
Choose the Fill tool |
An overlay covers the image area that you clicked. |
If the selection outline is not closed, the fill covers the entire image. If this is the case, click the Eraser tool |
6 |
Click Process to preview the result.
|
If you are not happy with the result, click Edit Mask to return to the previous view and touch up the cutout. |
The background layer is automatically promoted to a raster
layer when you use the Object Extractor command.
|
You can switch from the Brush tool to the Eraser tool by right-
clicking and dragging in the preview area.
|