Capturing Video
The steps on how to capture are similar for all types of camcorders except for the available capture settings in the Capture Video Options Panel that can be selected for each type of source.
| To capture video and photos from your camcorder |
1 |
Connect your camcorder to your computer and turn on the device.
Set it to Play (or VTR / VCR) mode.
|
2 |
In Capture Options Panel, click Capture Video.
|
3 |
Select your capture device from the Source drop-down list.
|
4 |
Select a file format to use for saving your captured video from the
Format drop-down list. Browse the folder location where the files
will be saved under Capture folder.
|
Click Options to customize capture settings specific to your video device. |
5 |
Scan your video to search the part for capture.
|
If you are capturing video from a DV or HDV camcorder, use the Navigation Panel to play your video tape. |
6 |
Click Capture Video, when your video for capture is already on cue.
Click Stop Capture or press [Esc] to stop capturing.
|
7 |
To capture a photo from the video footage, pause the video on the
desired photo then click Take a Snapshot.
|
When your camcorder is in Record mode (usually named CAMERA or MOVIE), you can capture live video. |
The available settings in the Video properties dialog box vary, depending on the capture file format that you have chosen. |
Capture Video Options Panel
• |
Duration — Sets the length of time for the capture.
|
• |
Source — Displays the detected capture device and lists other
capture devices installed in your computer.
|
• |
Format — Gives you a list of options where you select a file format
for saving your captured video.
|
• |
Capture folder — This feature allows you to specify a folder where
you want your captured files to be saved.
|
• |
Split by scene — Automatically separates captured video into several
files based on changes in shooting date and time when capturing
video from a DV camcorder.
|
• |
Capture to library — Choose or create a Library folder where you
want your video to be saved.
|
• |
Options — Displays a menu allowing you to modify your capture
settings.
|
• |
Capture Video — Transfers video from your source to your hard
drive.
|
• |
Take a Snapshot — Captures the displayed video frame as a photo.
|
Direct video capture to MPEG format
Corel VideoStudio Pro supports real-time capture from DV, analog, or any video source to MPEG-2 format.
| To capture video in MPEG-2 format |
1 |
In Source, choose your video source.
|
2 |
Specify or browse for the destination folder where you want your
clips to be stored in Capture folder.
|
3 |
Click Options and select Video Properties. In the dialog box that
opens, select a profile in the Current Profile drop-down menu.
|
4 |
Click OK.
|
5 |
Click Capture Video to start capturing and Stop Capture to end your
capturing session. Your media clip will automatically be stored as
MPEG-2 format in the folder you specified.
|
Split by scene
A single DV tape may contain several videos that were shot at different times. Corel VideoStudio Pro automatically detects these segments and saves them as separate files.
| To use Split by scene option in Capture Step |
1 |
Select the Split by scene option in the Options Panel.
|
2 |
Click Capture Video. Corel VideoStudio Pro will automatically look
for the scenes according to their shooting date and time and capture
them as separate files.
|
Digital Video (DV)
To capture Digital Video (DV) in its native format, select DV from the Format list in the Options Panel. This saves the captured video as a DV AVI file (.avi).
You can also use the DV Quick Scan option to capture DV video
DV AVI Type-1 and Type-2
|
When capturing DV, click Options in the Options Panel and select Video properties to open a menu. In the Current Profile, choose whether to capture DV as DV Type-1 or DV Type-2.
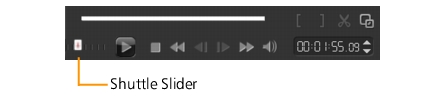
Controlling the DV camcorder with the Navigation Panel
When capturing from a DV camcorder, use the Navigation Panel to scan your footage and locate the scenes you want to capture.
| To find scenes in your video |
• |
Drag the Shuttle Slider to move forward and back through the
footage at variable speeds.
|
High Definition Video (HDV)
You can capture high definition video using the following methods:
• |
For HDV camcorders, use the Capture video feature.
|
• |
For AVCHD and Blu-ray Disc devices, use Import from Digital Media.
|
| To capture video from an HDV camcorder |
1 |
Connect your HDV camcorder to your computer’s IEEE-1394 port
using the IEEE-1394 cable.
|
2 |
Turn on your camcorder and switch it to Play/Edit mode and make
sure that your HDV camcorder is switched to HDV mode.
|
For Sony HDV camcorders, flip open the LCD screen and see if HDVout I-Link is on the LCD screen to check if the camera is set to HDV mode. If you see DVout I-Link, press P-MENU at the lower right of the screen. In the menu, press MENU > STANDARD SET > VCR HDV/DV and press HDV. |
3 |
Click Capture Step and click |
Digital TV or DVB-T video
Before capturing, ensure that the DVB-T source is connected via a compatible capture card installed on your computer.
| To capture DVB-T video |
1 |
Click Capture Step and select Capture Video.
|
2 |
Select Digital TV Source from the Source drop-down list.
|
3 |
Click Options and select Video Properties. The Video properties
dialog box will appear.
|
4 |
In the Input Source tab, select TV from the Input source drop-down
list. Click OK.
|
5 |
In Channel List, click Start Scan to start scanning for channels.
|
DVB-T channels are not automatically scanned. Make sure to manually scan the channels first before capturing. |
6 |
Click Capture Video.
|
7 |
Click Yes when prompted if you want to start capturing and
automatically recovering DVB-T video.
|
8 |
Follow the remaining steps as described in the procedure for
capturing videos.
|
Analog video
When footage is captured from analog sources such as VHS, S-VHS, Video-8, or Hi8 camcorders/VCRs, it is converted to a digital format that can be read and stored by the computer. Before capturing, choose the desired file format to use for saving the captured video in the Options Panel’s Format list.
| To specify the type of video source you are capturing from |
1 |
Click Options and select Video properties.
|
2 |
In the dialog box that opens, you can customize the following
capture settings:
|
• |
In the Input Source tab, choose whether you are capturing NTSC,
PAL, or SECAM video and select the Input source (TV, Composite,
or S-Video).
|
• |
In the Color Manager tab, you can fine tune the video source to
ensure good quality captures.
|
• |
In the Template tab, choose the frame size and compression
method to use for saving the captured video.
|
TV footage
Corel VideoStudio Pro allows you to capture TV footage through a TV tuner. Capture a segment of your favorite television show on regular TV or cable then save it in your hard drive in AVI or MPEG.
| To capture TV footage |
1 |
Select your TV tuner device from the Source drop-down list.
|
2 |
Click Options > Video Properties to open the Video properties dialog
box. If needed, adjust the settings accordingly.
|
Click the Tuner Information tab to choose Antenna or Cable, scan available channels in your region, and more. |
3 |
In the Channel box, specify the channel number from which to
capture.
|
|
|
Was this page helpful? Send feedback. (Internet connection required.)
|
Copyright 2012 Corel Corporation. All rights reserved.