Ripple Editing
Ripple Editing allows you to insert or remove clips while automatically moving other clips (including empty spaces) accordingly, to make room for it on the Timeline. Ripple editing begins after the insertion point. Use this mode to maintain the original synchronization of tracks when inserting or deleting clips.
This feature is useful when you want other titles or tracks to play along with a particular moment in the video. This also makes editing more efficient by keeping all tracks synchronized, using the video track as reference.

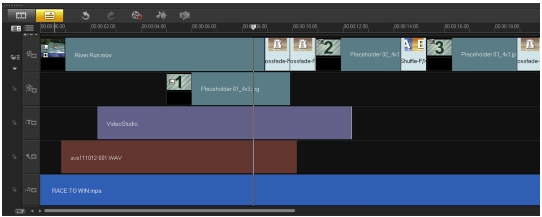
Original Timeline

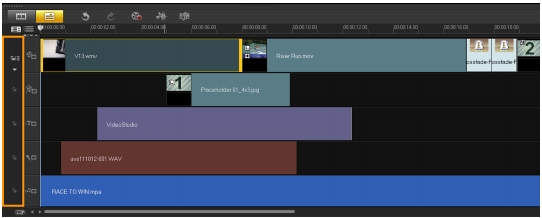
Timeline after a clip is inserted in the Video Track with Ripple Editing disabled. Only the clips on the Video Track are moved when a new clip is inserted.

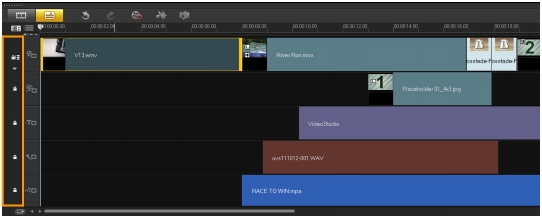
Timeline after a clip is inserted in the Video Track with Ripple Editing enabled on some tracks. Clips on the tracks with Ripple Editing enabled move when a new clip is inserted to maintain original synchronization.
| To insert clips in Ripple Editing mode |
1 |
Click Enable/Disable Ripple Editing to activate the panel, then select
the corresponding box for each track where you want to apply
Ripple Editing.
|
2 |
Drag the clip to insert from the Library to the desired position on the
Timeline. As soon as the new clip is in place, all clips where Ripple
Editing is applied will shift accordingly while maintaining their track
positions relative to one another.
|
Ripple Editing also works in removing clips. |
|
|
Was this page helpful? Send feedback. (Internet connection required.)
|
Copyright 2012 Corel Corporation. All rights reserved.