Quick links to procedures on this page:
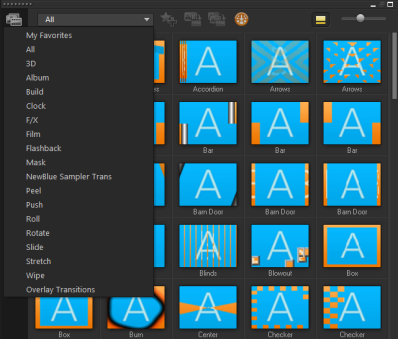
There are 16 types of transitions in the Library. For every type, you choose a specific preset effect by using the thumbnails. For example, you can choose from popular transition styles such as Dissolve, Crossfade, and Fade to black.

| • |
In the Edit workspace, do one of the following: |
|
• |
Click Transitions in the Library and select from various categories of transitions from the drop-list. Scroll through the transitions in the Library. Select and drag an effect between two video clips in the Timeline. Drop your effect and it will snap into place. You can only drag and drop one transition at a time. |
|
• |
Double-click a transition in the Library to automatically insert it into the first empty transition slot between two clips. Repeat this process to insert a transition at the next cut. To replace a transition in your project, drag the new transition onto the transition thumbnail for replacement in the Storyboard View or Timeline View. |
|
1
|
Select Settings > Preferences > and click the Edit tab. |
|
2
|
Click the Apply current effect to video track button  or right-click on the transition and select Apply current effect to video track. or right-click on the transition and select Apply current effect to video track. |
| • |
Click the Apply random effect(s) to video track button  . . |


To further customize transitions, you may also do one of the following:
|
• |
In Default transition effect duration, enter a value for the number of seconds you want transitions to take place in between clips. |
|
• |
In Random effects, click the Customize button and select transitions you want to use in your project when transitions are added in between clips. |
Copyright 2014 Corel Corporation. All rights reserved. Legal Notice
