Quick links to procedures on this page:
White balance restores the natural color temperature of an image by removing unwanted color casts due to conflicting light sources and incorrect camera settings.
For example, an object illuminated with incandescent lights may turn out too reddish or yellowish in an image or video clip. To successfully achieve a natural look, you need to identify a reference point in your image which represents the color white. Corel VideoStudio Pro gives you different options in selecting the white point:
| • |
Auto — Automatically chooses a white point that is well-matched with the overall color of your image. |
| • |
Pick Color — Allows you to manually select the white point in the image. Use the Eyedropper Tool to pick a reference area that should be white or neutral gray. |
| • |
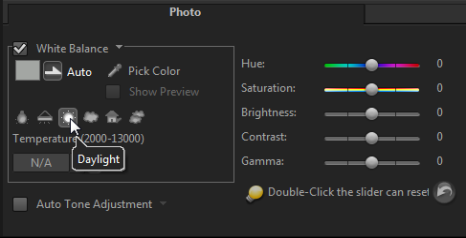
White balance presets — Automatically selects the white point by matching specific light conditions or scenarios. |
| • |
Temperature — Allows you to specify color temperature of light sources in Kelvin (K). Lower values indicate Tungsten, Fluorescent and Daylight scenarios while Cloudy, Shade and Overcast fall under high color temperature. |
|
2
|
In the Edit workspace, click Options to open the Options panel. |
|
3
|
Click the Video or Photo tab and click Color Correction. |
|
6
|
If you have selected Pick color, choose Show preview to display a preview area in the Options Panel. |
|
Note: Click the White balance drop-down arrow to display more color adjustments you can use. Select either Vivid Color or Normal Color for the color intensity. As for the level of sensitivity of White balance, you can choose any of the following options: Weaker, Normal and Stronger. |
Copyright 2014 Corel Corporation. All rights reserved. Legal Notice