Quick links to procedures on this page:
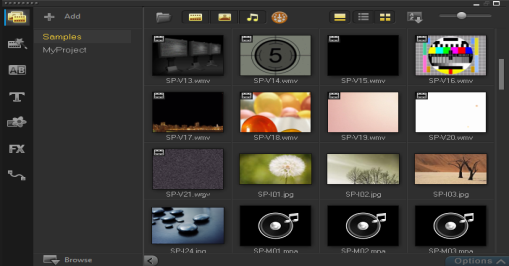
The Library is a storage depot for everything you need to create a movie: video clips, photos, audio files, instant project templates, transitions, titles, filters, graphics, and tracking paths.
Create a custom library for your project. You can select, add, and delete media in the Library. If the media files are moved from their original location, you can automatically restore the links. Remember to export the library to create a backup on the hard drive or an external storage device. You can then import the library at a later time.
After completing a project, you can reset the Library to restore the default media clips. The files you added will be deleted from the Library, but not from their original location. You can always choose to re-import your media files into the Library.

Right-click a clip in the Library to view the clip's properties as well as copy, delete, or split clips by scene.
You can also trim a clip in the Library by using dragging the Scrubber in the Player panel to set the Mark-in/Mark-out points.
Video format support:
Input: AVI, MPEG-1, MPEG-2, HDV, AVCHD, M2T, MPEG-4, M4V, H.264, QuickTime*, Windows Media Format, MOD (JVC MOD File Format), M2TS, TOD, BDMV, 3GPP, 3GPP2, DVR-MS, SWF, DivX*, UIS, UISX, WebM
Output: DVAVI, MPEG-2, MPEG-4, H.264, QuickTime*, Windows Media Format, 3GP, 3GP2, AVCHD, BDMV, DivX*, UIS, UISX, WebM
*Drivers need to be installed to enable this option.
Image format support:
Input: BMP, CLP, CUR, EPS, FAX, FPX, GIF87a, IFF, IMG, JP2, JPC, JPG, MAC, MPO, PCT, PIC, PNG, PSD, PXR, RAS, SCT, SHG, TGA, TIF/TIFF, UFO, UFP, WMF, PSPImage, Camera RAW (RAW/CRW/CR2/BAY/RAF/DCR/MRW/NEF/ORF/PEF/X3F/SRF/ERF/DNG/KDC/D25/HDR/SR2/ARW/NRW/OUT/TIF/MOS/FFF), 001, DCS, DCX, ICO, MSP, PBM, PCX, PGM, PPM, SCI, WBM, WBMP
Output: BMP, JPG
Audio format support:
Input: Dolby Digital Stereo, Dolby Digital5.1, MP3, MPA, QuickTime, WAV, Windows Media Audio, MP4, M4A, Aiff, AU, CDA, AMR, AAC, OGG
Output: Dolby Digital Stereo, Dolby Digital 5.1, M4A, OGG, WAV, WMA
| • |
In the Library, do one of the following: |
|
1
|
Click Add to create a new library folder where you want to store your media clips. |
|
2
|
Click the Import Media Files button  to locate your files. to locate your files. |
Click Browse to open the File Explorer where you can drag and drop files to the Library.
|
1
|
In the Library, select a clip and press [Delete]. |
|
Note: While the clips are referenced in the Library, they actually remain in their original location, so when you delete a clip from the Library, only the reference is deleted. You can still access the actual file in the location where it is stored. |
|
1
|
Click Settings > Library Manager > Export library and specify a folder location where you want to save your Library. |
This action creates a backup of the virtual media file information of your current library in the directory you specify.
|
1
|
Click on Settings > Library Manager > Import Library and find the folder that you want to import. |
| • |
Click Settings > Library Manager > Reset Library. |
This action restores the Library to the default settings and deletes all user added files.
Copyright 2014 Corel Corporation. All rights reserved. Legal Notice