Fountain fills
A fountain fill is a smooth progression of two or more colors that adds depth to an object. Fountain fills are also known as gradient fills.
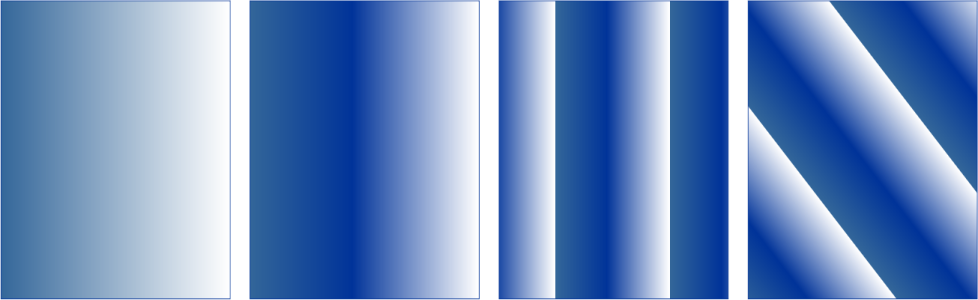
There are four types of fountain fills: linear, elliptical, conical, and rectangular. A linear fountain fill flows in a straight line across the object, a conical fountain fill creates the illusion of light hitting a cone, an elliptical fountain fill is dispersed in concentric ellipses from the center of the object, and a rectangular fountain fill is dispersed in concentric rectangles from the center of the object.

There are four types of fountain fills (left to right): linear, elliptical, conical, and rectangular.
The application provides a collection of fountain fills that you can access. You can browse the available fountain fills, search by keywords, mark fills as favorites, and sort fills. You can also download additional fill packs. For more information, see Find and view fills and transparencies.
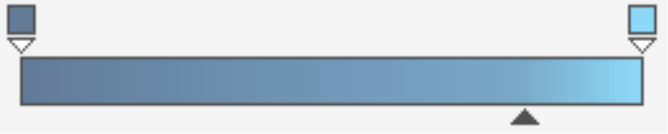
Any fountain fill can be modified to suit your needs, and you can create your own fills from scratch. Fountain fills can contain two or more colors, which you can position anywhere in the fill’s progression. You can specify fill attributes such as the direction of a fill’s color blend, the fill’s angle, center point, and midpoint. You can also set the width and height of the fill as a percentage of the object’s width and height. Plus, you can smooth, skew, rotate, repeat, and mirror a fill.
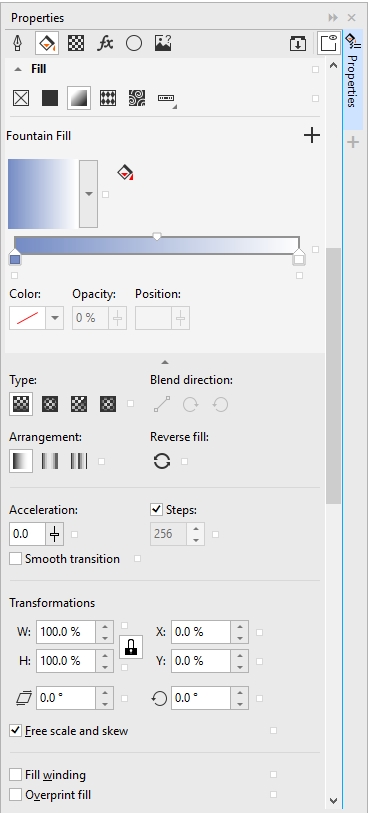
You can edit fill properties from the Properties docker.
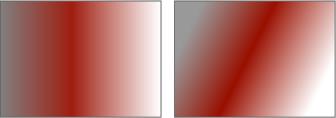
Left to right: An object with a linear fountain fill applied. Another color is added to the fill. The fill is resized to 50% of the object’s width and height, and then repeated and mirrored. Last, the fill is rotated 45 degrees.
After you create a fountain fill, you can save it for future use. For more information, see Save fills and transparencies.
You can adjust the print and display quality of the fountain fill by specifying the number of fountain steps. By default, the fountain steps setting is locked so that the print quality of the fountain fill is determined by the value specified in the print settings and the display quality is determined by the default value you set. However, you can unlock the fountain steps setting and specify a value that applies to both the print and view quality of the fill. For information about setting fountain fill steps for printing, see Fine-tune print jobs.
To apply a fountain fill
For information about how to find fills in the Fill picker, see To find, filter, and sort fills and transparencies.
You can also apply a fill by clicking a fill thumbnail in the Fill picker. This action applies the fill without closing the Fill picker.
You can add a color to a fountain fill by clicking the Interactive fill tool ![]() in the toolbox, clicking the Fountain fill button on the property bar, and dragging a color from the color palette to an object’s interactive vector handle.
in the toolbox, clicking the Fountain fill button on the property bar, and dragging a color from the color palette to an object’s interactive vector handle.
To create a fountain fill
|
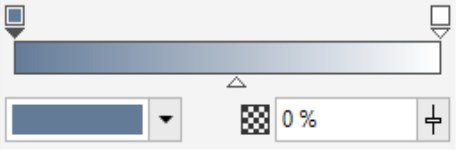
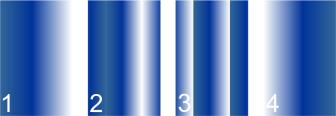
The effect of repeating and mirroring can be seen only if the fill is smaller than the object. The following illustration shows a default fill (1), the same fill resized and then repeated and mirrored (2), the fill resized and repeated (3), and the fill reversed (4). |
|
|
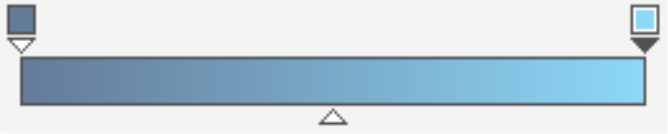
Select either the two nodes or the midpoint between them, and in the Fill area of the Properties docker, and choose a blend direction option:
• Linear color blend — blends the colors along a straight line, beginning at the start color and continuing across the color wheel to the end color
• Counterclockwise color blend — blends the colors along a counterclockwise path around the color wheel
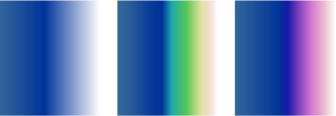
The following color blend options are illustrated below from left to right: Linear color blend, Clockwise color blend, Counterclockwise color blend. |
|
|
For more information, see Combine objects.
|
|
You can also apply a custom fountain fill by clicking the Interactive fill tool ![]() in the toolbox and dragging colors from the color palette in the document window onto the object’s interactive vector handles. You can mix colors by selecting one of the interactive vector handles, pressing Ctrl, and clicking a color on the color palette.
in the toolbox and dragging colors from the color palette in the document window onto the object’s interactive vector handles. You can mix colors by selecting one of the interactive vector handles, pressing Ctrl, and clicking a color on the color palette.
To change the fountain fill print and display quality
When the Fountain steps box is locked, the number of steps in the printed fountain fill is determined by the value specified in the Print dialog box. For information about setting fountain fill steps for printing, see Fine-tune print jobs.