Bitmap mosaics (PhotoCocktail effect)
The PhotoCocktail effect lets you turn your photos and vector art into unique mosaics composed of selected images.
Turning artwork into a mosaic composed of images (Elements from artwork by Ariel Garaza Díaz)
You can customize your mosaic by adjusting the number of tiles and the extent to which your photo or vector art blends with the mosaic tiles. You can create the mosaic as a single bitmap or as an array of bitmap tiles that are easy to edit. Several methods are available to help you control the quality of the mosaic.
To create a mosaic from bitmap or vector objects
PhotoCocktail settings
Additional controls are available in the PhotoCocktail docker to help you customize the effect.
Keep original source: Enable this check box if you want to keep the reference image or objects after applying the effect. Disable the check box to delete the reference image and leave only the mosaic.
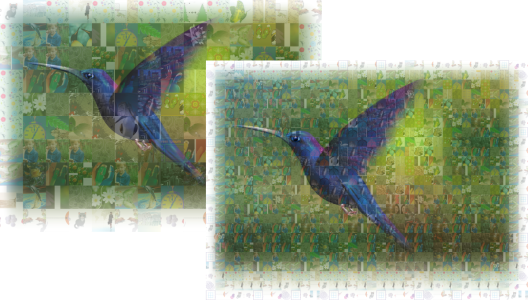
Columns: This box lets you specify how many columns of tiles to include in the mosaic. The bigger the number, the more detail in the mosaic.
Rows: Shows the number of rows to be included in the mosaic. The number is automatically calculated based on the value in the Columns box.
Left: Mosaic with low grid density (fewer columns and rows); Right: Mosaic with high grid density
You can recreate the reference image more accurately by applying a blending effect. Blending lets you superimpose the reference image over the mosaic tiles.
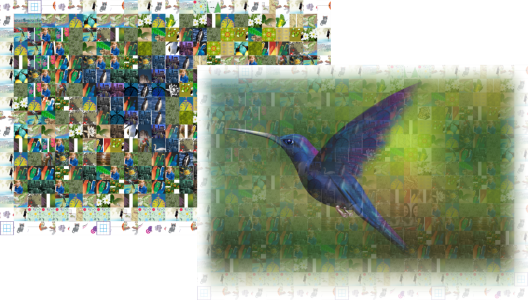
Blending: This box lets you specify to what extent to blend the reference colors with the tile colors. Higher values increase the likeness of the mosaic to the reference image.
Left: No blending; Right: Large amount of blending applied
You can use duplicate tiles in the final mosaic.
Duplicates: Enable this check box to repeat tiles in the final mosaic. You can specify the minimum number of tiles that surround duplicate tiles in the Tiles box.
Output controls let you define the composition and quality of the final mosaic.
Composition: This list box lets you choose one of the following options:
Edges: This list box lets you choose a method for treating incomplete tiles around the edges. For example, incomplete tiles around the edges can be removed from the final mosaic, or the output can be stretched to match the reference image. Stretching the output results in mosaic tiles that are rectangular rather than square.
Left: Tiles are stretched to match the dimensions of the reference image; Right: Partial tiles along the bottom edge are removed.
Priority: This list box lets you choose one of the following methods for adjusting the output quality:
The mosaic DPI is influenced by the grid density and the dimensions of the mosaic.
The tile size is a good indicator of output quality. The higher the tile size, the better the quality. Dividing the mosaic size in pixels by the grid density gives you the tile size in pixels.


