Position objects
You can position objects by dragging them to a new location, by nudging, or by specifying their horizontal and vertical coordinates.
Nudging lets you move an object in increments by pressing the Arrow keys. The increment value is known as "nudge distance." Micro-nudging lets you move an object by a fraction of the nudge distance. Super-nudging lets you move an object by a multiple of the nudge distance. By default, you can nudge objects in 0.1-inch increments, but you can change this increment value to suit your needs. You can also change micro-nudge and super-nudge values.
To position an object, you can set horizontal and vertical coordinates that are relative to the center anchor point, or other anchor point, of the object.
You can also move an object to another page.
To move an object
You can move an object to another page by dragging the object over a page number tab at the bottom of the document window and then dragging the object into the document window.
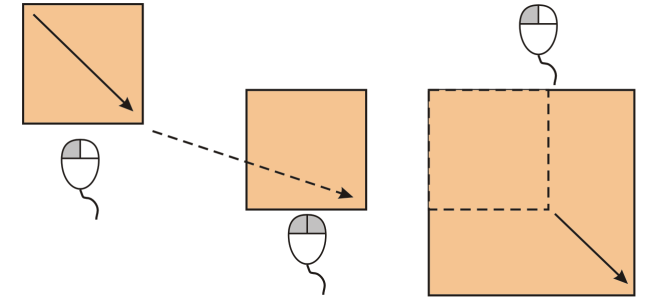
To move an object while drawing
Moving an object while drawing
To nudge an object
To set nudge distances
You can also set the nudge distance by deselecting all objects and typing a value in the Nudge distance box on the property bar.
To save the new nudge distances to use in new drawings, click Tools ![]() Save Settings as Default.
Save Settings as Default.
To position an object by x and y coordinates
The object origin, also known as "anchor point" or "reference point," can be the center of an object or any one of the object’s selection handles. The object origin remains stationary when an object is positioned by typing values in the x and y boxes on the property bar.
To position an object by changing the anchor point
By default, the point of origin (0,0) is at the lower-left corner of the drawing page.
When you enable the Relative position check box on the Transform docker, the position of the center anchor point is identified as 0,0 in the X and Y boxes. When you specify a different position in the X and Y boxes, the values represent a change from the current position as measured from the center anchor point of the object.
