Format lines and outlines
Lines are treated the same way as outlines of closed shapes, such as ellipses and polygons. In some programs, outlines are known as strokes or thick lines.
You can change the appearance of both lines and outlines. For example, you can specify their color, width, style, corner shape, and cap style. You can also remove a line or outline, and you can create your own line or outline style.
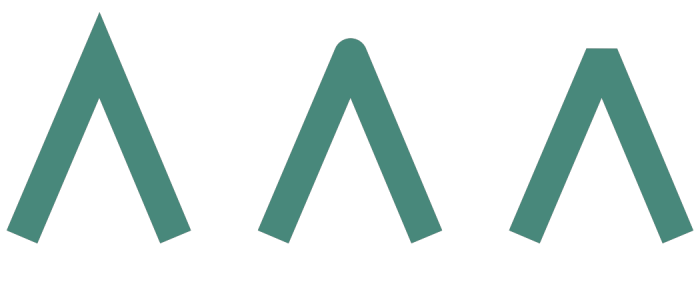
You can choose a corner style to control the corner shape in lines and a line cap style to change the appearance of a line’s endpoints.
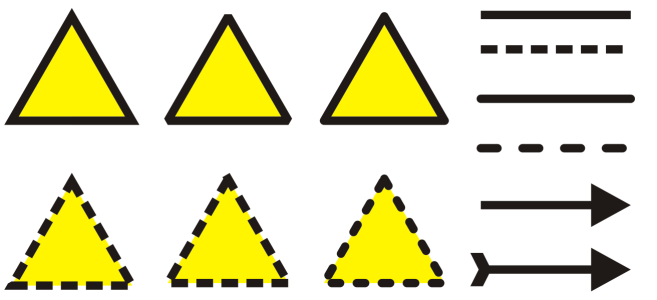
Different corner styles were applied to the upper and lower row of triangles. Different line caps were applied to the lines in the upper-right corner. Arrowheads were applied to the lines in the lower-right corner.
With dashed lines and outlines, the Default dashes option applies the dashes along the line and outline without any adjustments in the corners and endpoints. However, you can control the appearance of dashes in the end and corner areas by using two additional options. The Align dashes option aligns dashes with the end and corner points so that there is no empty space in the corners and at the start and end of a line or outline. The Fixed dashes options creates dashes of fixed length in the end and corner points.
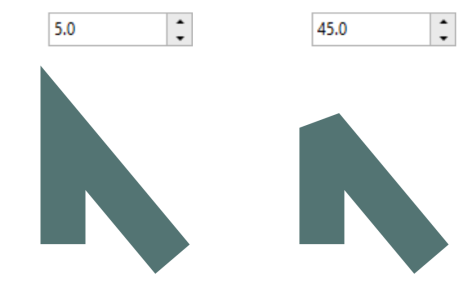
You can set the miter limit to determine the corner shape in objects containing lines that meet at sharp angles. Corners with angles above the miter limit are pointed (mitered); corners with angles below the miter limit are beveled (squared off).
You can choose from a variety of line styles. Line styles are organized into two categories: standard and enhanced.
Standard line styles consist exclusively of dashes and spaces. The dashes and spaces vary to create different patterns. You can use a preset pattern or create a custom pattern. Each line style pattern is defined by units. There are fifty units — each of which can be "on" (filled in) or "off" (blank) to define a pattern that contains a maximum of ten dashes or spaces. You can also set the pattern length. When you increase or decrease the pattern length, the dashes and spaces appear longer or shorter because you are changing the size of the units to fit the specified pattern length. The line width is not affected if you change the pattern length.
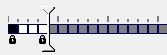
In the Edit line style dialog box, each box represents a unit that can be filled in to create a dash, or left blank to create a space. You can move the white slider to the right to increase the number of units in your pattern.
Enhanced line styles consist of shapes, zigzags, or multiple lines to create diverse patterns. You can edit an enhanced line style by changing the width of the lines or the width of the overall pattern.
When you apply an enhanced line style to a filled object, the fill is contained within the path of the object, not the outline. For example, if you have an object with a zigzag line style, the fill does not extend into the points of the zigzag.
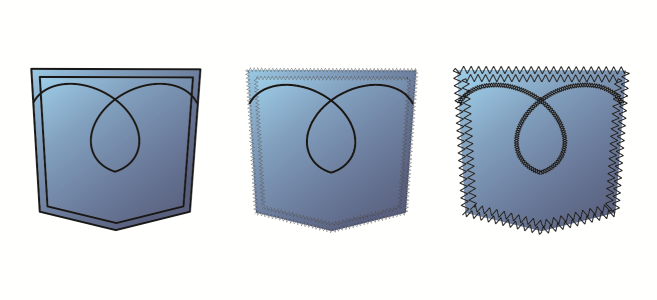
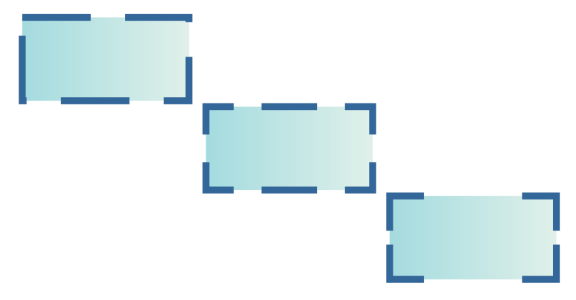
These pocket drawings use a standard line style (left), an enhanced line style with low pattern-width settings (center), and an enhanced line style with higher pattern-width settings (right). The fill is always contained within the object’s path, not the object’s outline.
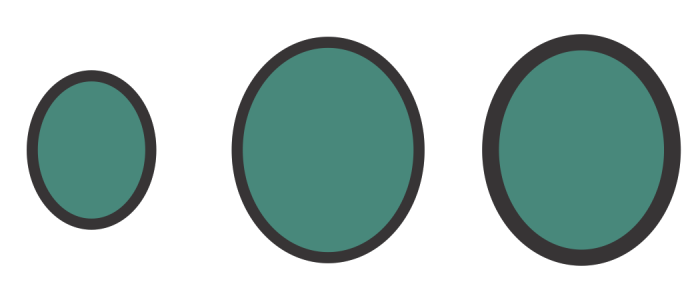
In addition, you can specify the position of the outline by placing it outside or inside the object, or centering it so that it overlaps equally the outside and the inside of an object. The effect of outline position options are more obvious with thick outlines.
The outline created by a standard or enhanced line style can appear in front of or behind a fill. For example, you may want an outline to appear behind a fill to line up the outline with the outer edge of the fill. You can also link the outline thickness to an object’s size so that the outline increases when you increase the object’s size and decreases when you decrease the object’s size. In addition, you can set the outline to print on top of underlying colors, without removing them during printing.
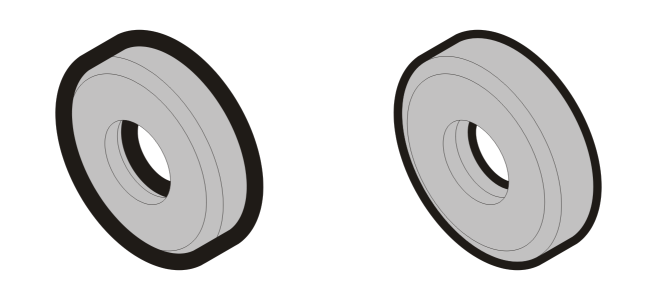
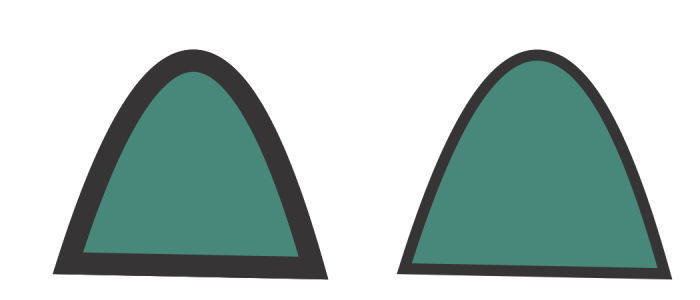
In the drawing on the left, the outline is in front of the fill. Because the outline width is centered on the object’s path, the outline covers part of the object’s fill. In the drawing on the right, the outline width is the same, but the outline has been moved behind the fill and therefore lines up with the outer edge of the object.
To change the color of a line or an outline
To specify line and outline settings

If the pattern Width value is too low, the pattern might not appear as expected. To view the pattern on your object, try increasing the pattern Width value and decreasing the outline Width value.
You can also specify line settings from the property bar or the Outline area of the Properties docker.
You can also change the color of a line or outline by right-clicking a color swatch on the color palette.