Join curves
You can join curves and line segments to create more complex curves as well as closed objects. The shape of the connecting lines is determined by the mode that you choose: Extend, Chamfer, Fillet, or Bézier Curve.
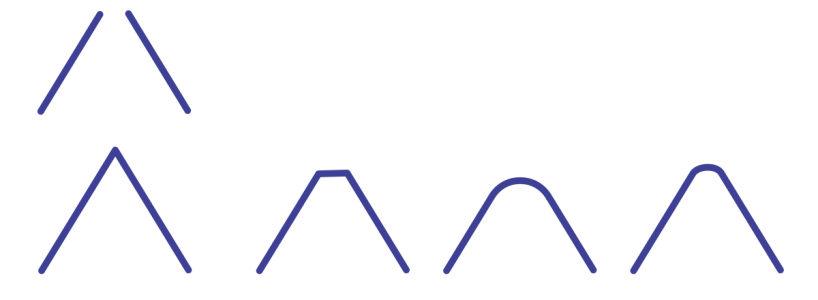
The lines in the upper-left corner were joined by using different modes. Modes from left to right: Extend, Chamfer, Fillet, and Bézier Curve.
You can also set the gap tolerance, which is the maximum distance between endpoints that can be joined. If the endpoints are further apart than the gap tolerance, they cannot be joined.
When you join curves, the resulting curve takes on the properties of the last object that was selected.
Joining curves and line segments can be the starting point for a more complex drawing.
To join curves
You cannot join interior points, only endpoints.
If endpoints to be joined do not share coordinates, the endpoints are extended to their intersection.
You can also connect the subpaths in a group of objects.
You can also select lines by marquee selecting. If the lines are marquee selected, the properties from the bottom object on a layer are used. To see which object is the bottom one, open the Objects docker by clicking Window ![]() Objects.
Objects.