Zoom, pan, and scroll
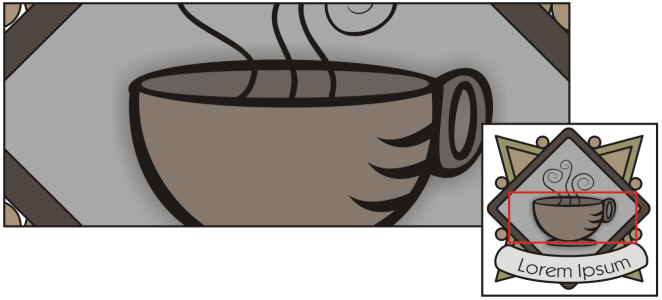
You can change the view of a drawing by zooming in to get a closer look or by zooming out to see more of the drawing. You can experiment with a variety of zoom options to determine the amount of detail you want.
Panning and scrolling are two additional ways to view specific areas of a drawing. When you work at high magnification levels or with large drawings, you may not be able to see the whole drawing. Panning and scrolling let you move the page around in the drawing window to view previously hidden areas.
You can also use the Quick Pan mode to switch from any active tool to the Pan tool. This feature lets you pan without having to change tools.
You can zoom in and out while you are panning, and you can pan while you are zooming. In this way, you can avoid having to alternate between the two tools. You can also specify default zooming and panning settings.
If you use a mouse wheel, the wheel zooms in and zooms out by default. You can set custom zoom increments for zooming with the mouse wheel. You can also use the mouse wheel to scroll.
By default, when zooming with a mouse and panning with the Pan tool, you are viewing the document at high resolution. However, you can show a low-resolution document preview for any device or method you are using to zoom and pan. You can also hide the low-resolution document preview for any device and method.
You can scroll a drawing by using the scroll bars that border the drawing window. You can show or hide the scroll bars.
To zoom

1
In the toolbox, click the
Zoom tool

.
2
On the property bar, click one of the following:
•
Zoom in 
— lets you increase the magnification level
•
Zoom out 
— lets you decrease the magnification level
•
Zoom to selected 
— adjusts the magnification level to fit the selected objects on the active page or the selected pages in multipage view
•
Zoom to all objects 
— adjusts the magnification level to fit all objects on the active page
•
Zoom to all pages 
— adjusts the magnification level to fit all pages in multipage view
•
Zoom to page 
— adjusts the magnification level to fit the active page
•
Zoom to page width 
— adjusts the magnification level to fit the width of the active page
•
Zoom to page height 
— adjusts the magnification level to fit the height of the active page

The Zoom to all pages button  is available only in multipage view. For more information about multipage view, see Page views.
The Zoom to selected button  is available only if objects or pages are selected before you click the Zoom tool.

You can also zoom in, zoom out, and zoom to all objects by using the Zoom In, Zoom Out, and Zoom to Fit commands in the View menu.
When you are not editing text, you can also access the Zoom tool by pressing Z.
Using the Zoom tool, you can also zoom in by clicking anywhere in the drawing window or dragging to select a specific area to magnify. To zoom out, right-click in the drawing window, or drag with the right mouse button to select a specific area.
You can also zoom in by using the Pan tool  and double-clicking in the drawing window. To zoom out, right-click in the drawing window.
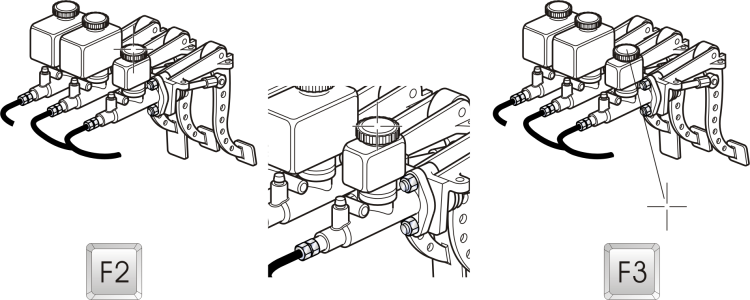
Use the following keyboard shortcuts to zoom during any task, such as when you are drawing an object:
•
F2 — zoom in around the pointer
•
F3 — zoom out around the pointer
•
F4 — zoom to all objects
•
F5 — refresh the drawing window
•
F6 — zoom to selected objects
The F2 and F3 shortcut keys let you zoom in and out around the pointer.
To pan in the drawing window

1
In the toolbox, click the
Pan tool

.

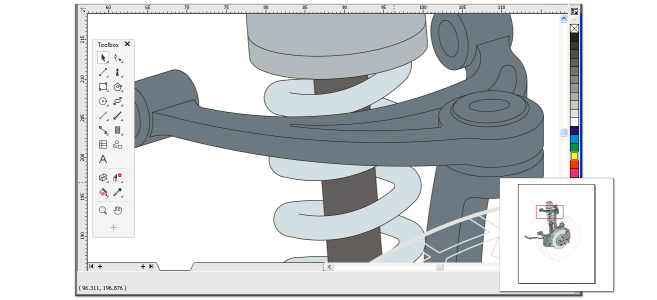
To pan in the drawing window while zoomed in on the drawing, click the Navigator button  in the lower-right corner of the drawing window.
Using the Navigator, you can display any part of a drawing without having to zoom out.
Using the Navigator (lower-right), you can display any part of a drawing without having to zoom out.
You can quickly center the page in the drawing window by double-clicking the Pan tool in the toolbox.
To switch to the Quick Pan mode

1
Click any selection, drawing, or shaping tool, and start using it.
2
Hold down the middle mouse button or wheel, and drag in the drawing window.
To specify default zoom settings

1
Click
Tools  Options
  Tools
Tools.
2
In the left pane of the dialog box that appears, click
Zoom/Pan.
3
To specify the action of the
Zoom or
Pan tool when you right-click in the drawing window, enable one of the following options:
•
Zoom out — zooms out by a factor of 2
•
Context menu — displays a menu of commands that let you zoom to a specific level
4
To specify how the page appears when the zoom is set to 100%, enable or disable the
Zoom relative to 1:1 check box.
•
When the option is enabled, a 100% zoom displays real-world dimensions.
•
When the option is disabled, a 100% zoom displays the full page, regardless of real-world dimensions.
5
To specify how the page appears when you zoom in and out using the mouse wheel, enable or disable the
Center mouse when zooming with the mouse wheel check box.
•
When the option is enabled, the area where the mouse pointer is located moves to the center of the screen as you zoom in and out using the mouse wheel.
•
When the option is disabled, the area where the mouse pointer is located stays in the same position as you zoom in and out using the mouse wheel.
To choose default settings for the mouse wheel

1
Click
Tools  Options
  Corel DESIGNER
.
2
In the left pane of the dialog box that appears, click
Display.
3
To specify the default action of the mouse wheel, choose
Zoom or
Scroll from the
Default action for mouse wheel list box.
|
|
|
Set the increments for zooming with the mouse wheel |
Move the Zoom rate slider. |
Set the increments for zooming with the mouse wheel while holding down Ctrl + Shift (Alternate Zoom) |
Move the Alternate Zoom (Ctrl + Shift) rate slider. By default, Alternate Zoom is faster than regular zooming, but you can customize it to be at a slower speed. |
Restore the default increments for zooming with the mouse wheel |
Click the Reset button next to the Zoom rate and Alternate Zoom (Ctrl + Shift) rate sliders . |
4
In the left pane of the
Options dialog box, click
Display.
To hide or display a low-resolution preview while zooming and panning

1
Click
Tools  Options
  Corel DESIGNER
.
2
In the left pane of the
Options dialog box, click
Display.
3
In the
Navigation area, choose one of the following from the
Low-resolution preview for responsive zooming and panning box:
•
Hide for mouse — shows the document at high resolution when you zoom with a mouse and pan with the
Pan tool, but enables a low-resolution preview for other methods such as touch
•
Always show — shows a low-resolution preview of the document for all methods and devices used to zoom and pan
•
Never show — always hides the low-resolution preview and shows the document at high resolution
To scroll by using a mouse wheel

•
Do one of the following:
•
To scroll vertically, move the wheel.
•
To scroll horizontally, press
Shift while you move the wheel.

The mouse wheel can be used for scrolling when the Scroll option for the mouse is enabled. For more information, see To choose default settings for the mouse wheel.

If the Zoom option for the mouse is enabled, you can scroll vertically by holding down Alt while you move the mouse wheel.
To hide or display the scroll bars

•
Click
View  Scroll Bars
.
A check mark beside the
Scroll Bars command indicates that the scroll bars are displayed.
is available only in multipage view. For more information about multipage view, see Page views.
is available only if objects or pages are selected before you click the Zoom tool.
and double-clicking in the drawing window. To zoom out, right-click in the drawing window.
in the lower-right corner of the drawing window.


