Adjustments docker
The Adjustments docker lets you apply a single color adjustment or several adjustments as you view your changes in the image window. The adjustments are non-destructive so you can experiment to get the desired results by showing or hiding them.
The Histogram, White Balance, and Light adjustments are shown by default in the Adjustments docker, but you can add more adjustments at any time. You can also remove adjustments.

The Adjustments docker lets you access commonly used adjustments.
The Adjustments docker features a histogram that you can use to evaluate and adjust the color and tone. For example, a histogram can help you detect hidden detail in a photo that is too dark because of underexposure (a photo taken with insufficient light). For information about using the histogram, see Histograms.
If you don’t like the results of an adjustment, you can restore its default settings. If you are satisfied with an adjustment, you can remember its settings so that you can apply it to another image. While you work in the Adjustments docker, you have access to all mask tools and other editing tools so that you can fine-tune the areas you want to adjust. For example, you can change the area to which an adjustment is applied by creating a mask and applying the adjustment to the newly defined editable area. In addition, you can create a mask from the areas affected by an adjustment so that you can re-use it when applying other adjustments.

The Options button to the right of an adjustment’s name gives you access to additional features.
To apply adjustments only to specific areas in an image, you can use the local adjustment mode, which activates the Brush Mask tool and allows you to paint over problematic areas. Other mask tools can also be used in local adjustment mode.
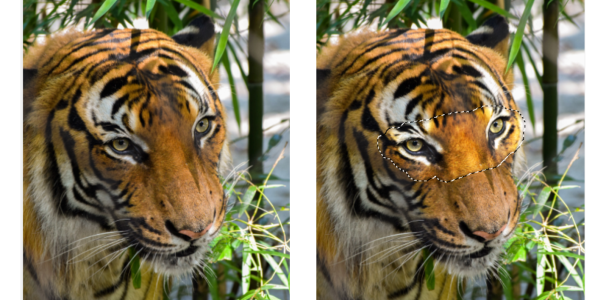
An image with the Light adjustment applied only to a specific area (right)
If you often use the same adjustments and you want to have them handy for each image you work with, you can choose to show them by default in the Adjustments docker.
To apply an adjustment
To change the area to which an adjustment is applied

(left) The Replace Colors adjustment was applied to the image. (right) The adjustment was confined to a rectangular editable area.
To create a mask from an applied adjustment
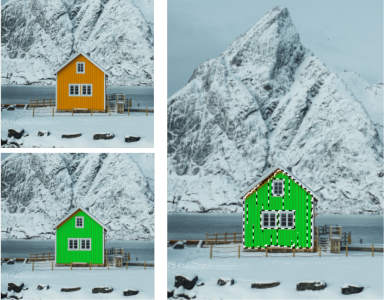
(left) The Replace Colors adjustment was applied to the image. (right) A mask was created from the areas to which the adjustment was applied.
To apply a local adjustment
You can also use other mask tools in local adjustment mode as well as commands from the Mask menu such as Mask from Object, Mask from Path, Invert Mask, Remove Mask, Mask Overlay, Mask Marquee, and Apply Smart Selection to Mask.
You can also exit the local adjustment mode by clicking any tool except for the Zoom tool, the Pan tool and all mask tools.