Clone image areas
You can copy pixels from one image area to another in order to cover damaged or unwanted elements in an image. For example, you can fix a tear or remove a person from an image by applying cloned pixels over the area you want to remove. You can also clone image elements you like and apply them to another image area or a second image. If you clone an object, the newly cloned areas are added to the active object. You can also create abstract images, based on pixels sampled from the original image.
When you clone, two brushes appear in the image window: a source point brush and a clone brush that applies the copied pixels from the source point. A crosshair pointer is displayed in the source point brush to distinguish it from the clone brush. The source point brush moves relative to the clone brush as you drag across the image.
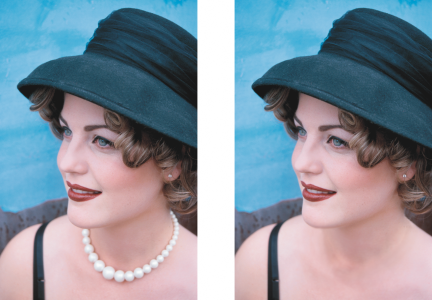
The Clone tool was used to remove the woman’s necklace.
You can also fix imperfections seamlessly by painting with sampled texture that matches the color of the surrounding area. The source point brush samples the texture from the source point. The target brush applies the sampled texture, matching it to the color of the surrounding area. You can reset the source point, and you can use the same source point for consecutive brushstrokes.
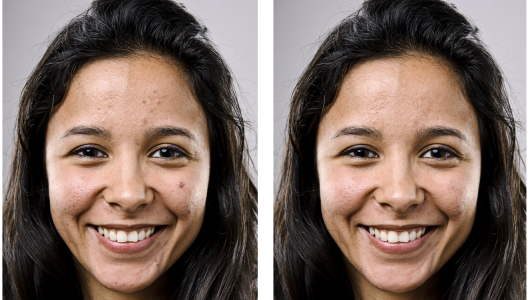
Some imperfections were removed from the girl’s face on the left by painting with sampled texture.
To clone an image area or object

1
In the toolbox, click the
Clone tool

.
2
Open the
Brush picker on the property bar, choose a clone category, and then choose a clone type.
3
Specify the settings you want on the property bar.
4
Click the image to set a source point for the clone.
If you want to reset the source point, right-click the area you want to clone.
5
Drag the clone brush in the image window to apply the
pixels from the source point.
|
|
|
Create abstract image areas based on pixels sampled from the source point |
Click Impressionism clone  or Pointillism clone  categories on the Brush picker before dragging in the image window. |
Create multiple clones of an object |
Click the Toggle cumulative button  on the Stroke attributes bar that is displayed in the Brush Settings docker. This option is available only for some of the Effect tools and the Clone tool. If the Brush Settings docker is not open, click Window  Dockers Brush Settings Dockers Brush Settings. |
Clone an object and the background simultaneously |
Click the Toggle merge source button  on the Dab attributes bar that is displayed in the Brush Settings docker. This option is only available when the Toggle cumulative button is disabled. |
Clone with symmetrical patterns |
Click Window Toolbars Symmetry bar, and choose the settings you want on the Symmetry bar before dragging in the image window. For more information on the Symmetry bar, see To paint symmetrical patterns. |
Change the size of the brush nib |
Hold down Shift, and drag towards or away from the nib center. |
Adjust the transparency of the brushstroke |
Hold down Alt, and click in the image window without releasing the mouse button to display a transparency slider. |
Adjust the feathering of the brushstroke |
Hold down Ctrl + Alt, and click in the image window without releasing the mouse button to display a transparency slider. |
Use the same source point as the last brushstroke |
Hold down Shift + Alt, and drag in the image window. |
Constrain the brushstroke to a straight line |
Hold down Ctrl, and drag in the image window. To change the direction (from vertical to horizontal or vice versa), hold down Shift. |
Clone in a straight line between two clicked points |
Right-click to set the source point and start cloning. Hold down Ctrl + Alt + Shift, and click in the image window to clone in a straight line. |
To retouch image areas using sampled texture
1
In the toolbox, click the
Healing Clone tool

.
2
Specify the settings you want on the property bar.
3
Click the image to set a source point, sampling the texture that you want.
If you want to reset the source point, right-click the area that you want to sample.
4
Drag across the area that you want to cover.
|
|
|
Use the same source point as the last brushstroke |
Hold down Shift + Alt, and drag in the image window. |
Change the size of the brush nib |
Hold down Shift, and drag towards or away from the nib center. |
|
|
Click Window Dockers Brush Settings, click the roll-down arrow on the available bars in the Brush Settings docker, and specify values for the attributes you want. |
Clone with symmetrical patterns |
Click Window Toolbars Symmetry bar, and choose the settings you want on the Symmetry bar before dragging in the image window. For more information on the Symmetry bar, see To paint symmetrical patterns. |
|
|
On the property bar, click the Realtime preview button to disable it. The effect of disabling the preview is obvious only with big brush nibs. |