Distinguish protected and editable areas
You can use masks for advanced image editing. A masks functions like a stencil placed over an image. In protected areas, paint and effects are not applied to the underlying image, whereas in editable areas, paint and effects are applied to the image. When you define an editable area for an image, you also define a corresponding mask, or protected area, for the same image.
You can display a mask overlay that appears only over protected areas to make it easy to differentiate between protected and editable areas. The mask overlay is a red-tinted, transparent sheet. If you adjust the transparency of a mask in certain areas, the degree of red displayed by the mask overlay in those areas varies accordingly.
You can hide the mask overlay. You can also change the color of the mask overlay so that it can be seen clearly against the colors of the image in the editable areas.
The border separating an editable area and its corresponding protected area is indicated by a dashed outline, called the mask marquee. You can display the mask marquee only when the mask overlay is hidden. You can change the color of the mask marquee so that it can be seen clearly against an image’s colors.
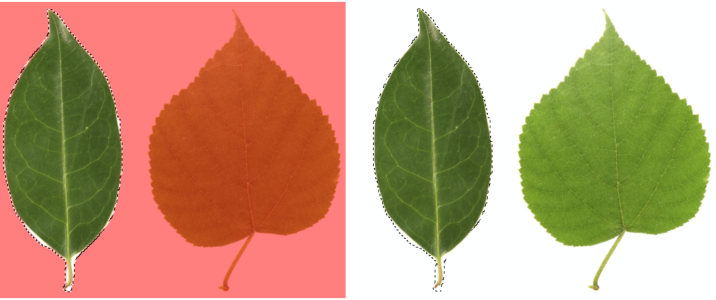
You can display the mask overlay (left) or the mask marquee (right).
If your editable area has a feathered edge, the mask marquee is placed by default along the outermost edge of the feathered section. However, you can specify a threshold value to position the mask marquee anywhere within the feathered edge of the section. For example, you may want the mask marquee to enclose only the pixels that are 100 percent editable and to exclude those that begin to blend with the protected area.
Adjusting the position of the mask marquee does not modify the size of the editable area; the mask marquee appears merely when a certain level of transparency is reached.
To display or hide the mask overlay
To change the color of the mask overlay
To display or hide the mask marquee
The mask marquee does not appear when you use a mask overlay or when you are adjusting the transparency of a mask.
To change the color of the mask marquee
The mask marquee does not appear when you use a mask overlay or when you are adjusting the transparency of a mask.
To position a mask marquee along the edge of an editable area
The threshold value that you specify is used for all other masks that you create until you change the value.