Save images
You can save an image to preserve it. You can also save images automatically at regular intervals and save backup copies of the file.
The application makes it easy to tell if an image has unsaved changes by adding an asterisk after its filename. The asterisk is added in different locations where the filename appears such as the Windows menu, the title bar, and the document tab.
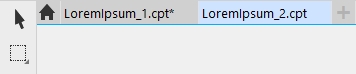
The asterisk after the filename on the document tab shows that the file LoremIpsum_1.cpt has unsaved changes. The file LoremIpsum_2.cpt has no unsaved changes.
When you save an image, you can specify a file format, a file name, and a folder where you want to save the file. Images are automatically saved using the currently selected file format, name, and location. The default format is the native Corel PHOTO-PAINT (CPT) file format. Saving to the Corel PHOTO-PAINT (CPT) file format retains all image properties — objects, the most recently created mask, alpha channels, grids, guidelines, and color information — so you can edit them later.
You can attach information (metadata) such as comments and notes to images so that you can find them and organize them more easily.
You can also export an image to another file format. For more information, see Export images.
Auto-saving and backing up images
You can specify auto-save settings to save an image automatically at regular intervals as you work. You can choose to save an image temporarily at a particular stage in its development, or you can overwrite the last version of the image.
Specifying backup settings lets you create a copy of an image each time you save. A backup copy is stored in the folder you choose.
You can also create a checkpoint to save a snapshot of the current image temporarily, so that you can return the image to that state if necessary. For more information about checkpoints, see To create or return to a checkpoint.
To save an image
When you save an image containing objects to a file format that does not support objects, you can continue working on the original file (which still contains the objects) in the image window. The image and its objects can still be saved to the Corel PHOTO-PAINT (CPT) format.
You can also save an image by clicking the Save button ![]() on the standard toolbar.
on the standard toolbar.
You can view notes in the Notes box in the Open dialog box when you open an image, or in the Import dialog box when you import an image. Some file formats do not let you save annotations with an image.
To specify auto-save settings
When you save the image or quit Corel PHOTO-PAINT, the checkpoint version of the image is lost.