Applying a warp effect
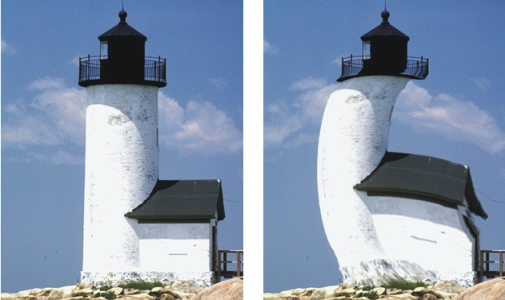
Corel Painter offers different options for warping images. The Image Warp effect lets you distort the surface of an image as if it were a sheet of pliable film. You can make images look as though they’re reflected in a fun house mirror.
Before (left) and after (right) applying the Image Warp effect
You can also use the Quick Warp effect to create some basic distortions, like stretch or bulge. These distortions are useful for preparing images for reflection maps when applying surface texture. For more information, see Creating reflection maps.
Quick Warp lets you create five types of distortions:
•
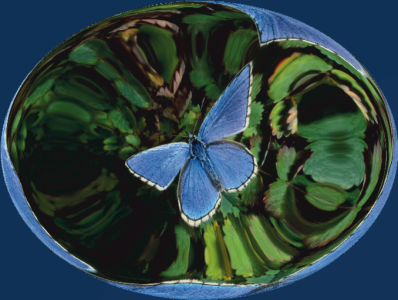
Sphere — warps the image spherically, like a reflection on a polished silver ball
An example of the Quick Warp effect using Sphere distortion
•
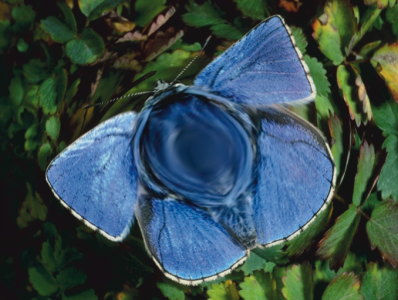
Bump — warps the center of the image toward you, making it appear convex
An example of the Quick Warp effect using Bump distortion
•
Valley — warps the center of the image away from you, making it appear concave
•
Swirl — distorts the image in a spiral
•
Ripple — distorts the image in concentric rings, like the rings created when you drop a stone into a pool of water
You can apply Image Warp and Quick Warp to the canvas, selections, and layers. However, Image Warp allows you to better target areas for warping, which is useful if you need to warp only a small portion of an image.
To warp an image using Image Warp

1
To apply the effect to:
•
The canvas — Click the
Canvas in the
Layers panel.
•
A selection — Click a selection tool from the toolbox, and drag in the document window to select an area.
•
A layer — Click a layer in the
Layers panel.
2
Choose
Effects  Surface Control
  Image Warp
.
3
In the
Image Warp dialog box, enable one of the following options:
•
Linear — pulls the selected area as if you were pulling from the top of a cone
•
Cubic — pulls a flat surface outward
•
Sphere — pulls a surface as if it were a lens
4
Adjust the
Size slider.
This slider controls the size of the area affected by dragging the cursor. The higher the number, the smaller the affected area.
5
In the document window, drag to distort the image.
A circle displays as you drag, which indicates the area affected.
To warp an image using Quick Warp

1
To apply the effect to:
•
The canvas — Click the
Canvas in the
Layers panel.
•
A selection — Click a selection tool from the toolbox, and drag in the document window to select an area.
•
A layer — Click a layer in the
Layers panel.
2
Choose
Effects  Surface Control
  Quick Warp
.
3
In the
Quick Warp dialog box, enable one of the following options:
•
Sphere — warps the image spherically, like a reflection on a polished silver ball
•
Bump — warps the center of the image toward you, making it appear convex
•
Valley — warps the center of the image away from you, making it appear concave
•
Swirl — distorts the image in a spiral
•
Ripple — distorts the image in concentric rings, like the rings created when you drop a stone into a pool of water
4
Adjust any of the following sliders:
•
Power — controls the intensity of the
Sphere and
Ripple effects
•
Angle Factor — controls the appearance of twisting and swirling in all effects


