Creating 3D tiles


You can create mosaics with a 3D appearance by rendering tiles into a mask. This technique places the tile shapes in a new channel named Mosaic Mask (in the Channels panel), which allows you to add depth to the tiles by using surface texture to create a 3D appearance.

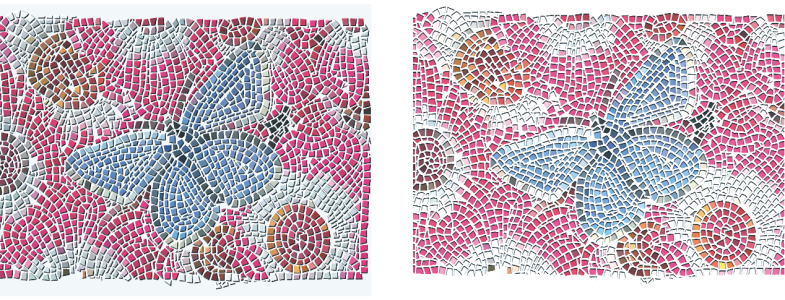
You can render tiles to a mask to create a look of 3D tiles.

With the tiles in a channel, you can also load the mosaic pattern as a selection or you can invert the channel to use the grout as a selection. The result can be particularly interesting when you work with a tessellated mosaic.

To give mosaic tiles a 3D look

Back to Top
1 Choose Effects Esoterica Make Mosaic and Tessellation.
2 Drag in the document window to apply tiles.
When the mosaic is complete, you can proceed to step 3.
3 Choose Render To Mask from the Action list box.
4 Click Render To Mask, and then click OK.
This action uses tile data to create a new channel in the Channels panel (Window Channels).
5 Choose Effects Surface Control Apply Surface Texture.
6 In the Apply Surface Texture dialog box, choose Mosaic Mask from the Using list box.
7 Adjust the Amount or Softness sliders to achieve the level of relief that you want.
In most cases, the best results are obtained with the Picture slider set at 100%. For more information, see Using 3D brushstrokes to create texture.
Because Corel Painter uses the tile shapes from the channel, the resulting surface texture gives the tiles a realistic 3D appearance.

Was this page helpful? Send feedback.