| New! Thick Paint |
|
The Thick Paint property bar offers presets for painting technique, as well as quick access to settings that allow you to prevent the brush from running out of paint and control how new brushstrokes blend with existing ones. This makes it easy to jump in and get stunning results right away. Or if you'd rather tinker and experiment to get a certain look, there are new Thick Paint panels where you can modify controls. For more information, see Thick Paint.
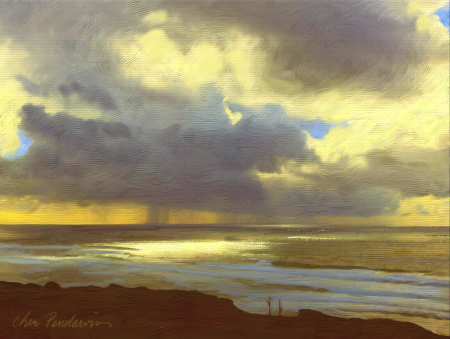
Thick Paint brushes create visible brush and knife marks in the painting. Artwork by Cher Pendarvis.
| Enhanced! Cloning |
|
And when you find or create a clone source that you want to reuse, you can save it with the image as an embedded source or as a texture in the Texture library so it’s always at your fingertips. There’s also an option that lets you embed a clone source in a document, saving you time finding the source when you get back to work and simplifying sharing with other photo artists. For more information, see Image cloning and sampling.

Use cloning techniques to transform your photo into a work of art. Artwork by Bill McEntee
| Enhanced! Drip and Liquid brush technologies |
|
Brushes that use the Drip method (all subcategories) or the Plug-in method (Liquid Brush subcategory) are even more versatile in Painter 2018. Take, for example, the Sargent Brush, one of most popular Painter brush variants ever. Loved by artists for its rich brushstrokes, the Sargent Brush can now be used on an empty layer to blend the currently selected color with an oil-like transparency. Alternatively, you can use variants that use drip or liquid technologies to pick up color from underlying layers. What’s more, this step forward in brush technology offers artists of all stripes a range of fresh brushes, opening up a world of possibilities. For more information, see Drip.

| New! Texture synthesis |
|
And in Painter 2018 you can fill with texture, whether you created it using the Synthesis feature, imported it to use with a Texture Painting brush, or found it in the Texture library. For more information, see Creating textures.

| New! 2.5D Thick Texture brushes |
|
Concept artists and character designers love Texture Painting for its ability it to deliver powerful realism, and Painter 2018 takes the experience to a whole new level. New 2.5D Thick Texture brushes apply strokes that feel like their jumping off the canvas. Do you need to make a character authentically reptilian? You can paint thick, exotic scales that look like they’re rising off the canvas. Or when you need to make skin more lifelike, Thick Texture brushes let you paint cavernous pores and amplify them by adjusting the directional lighting and appearance of depth. For more information, see Add depth to a Texture brush.
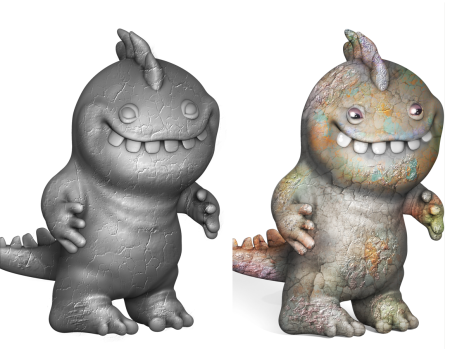
An example of a Texture brush that uses the impasto Depth method (left) and the impasto Color and Depth method (right). Model by Cris Palomino.
| New! Selection Brush tool and Selection brushes |
|
Because selections are critical to so many digital-art workflows, Corel Painter 2018 gives you more choices when you need to isolate an area of an image. How much time could you save if you could create a selection as easily and precisely as you can apply a brushstroke? The new Selection Brush tool lets you do just that. To make it easier to distinguish between selected and protected areas, you can display a color overlay when you apply a stroke. You can fine-tune the overlay to make it suit the document that you’re working in. There's a new Selection brush category with new variants designed specifically for creating selections when working with a complex shape or image area. There’s also the option of turning any stamp-based brush variant into a selection tool, giving you even more flexibility. What’s more, you can tweak a brush just as if you were using it to paint, then save it as a custom selection variant for reuse. And in response to artist feedback, there are a series of selection improvements in Painter 2018. For more information, see Selecting areas by painting.

| New! Natural Media Brushes library |
|
The new Natural-Media brush library makes it easy for artists transitioning from traditional to digital art. It gives quick, one-stop access to brushes that mimic traditional media, from pencils and pastels to oils and acrylics, and much more. If you’ve used it in the real world, chances are you’ll find the digital equivalent in the Natural-Media brush library. You can access the new collection by opening the Brush Selector and choosing Natural Media Brushes from the Brush Library list box. For more information, see Exploring brush categories in the Natural Media Brushes library.
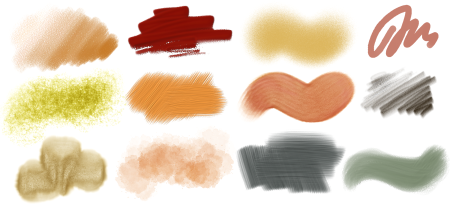
Examples of brushstrokes created with brush variants from the Natural Media Brushes library
| New! Random grain rotation |
|
Another user request in Painter 2018 is random grain rotation. This new feature slightly rotates the paper grain in each stroke, giving brushstrokes a more natural, organic look. For more information, see Grain controls.

Select your favorite grainy brush, enable Random Grain Rotation, and Corel Painter will slightly rotate the grain in each individual stroke.
Copyright 2017 Corel Corporation. All rights reserved.