Quick links to procedures on this page:
You can create a mosaic from scratch or from a clone source. When you create a mosaic, it is applied directly to the canvas. You cannot apply mosaic tiles inside a layer.
After you exit the Make Mosaic dialog box, you can treat this rendered image just like any photograph or painting. You can paint it, apply effects to it, select portions of it, or increase the canvas size. You can also integrate mosaic effects into an existing image. For information, see Adding mosaic effects to an image.
After you apply tiles to a mosaic, you can select, deselect, or remove tiles to change their color or apply effects to them. For information, see Selecting and removing tiles and Specifying tile and grout color.
When creating mosaics, you can follow these helpful guidelines:
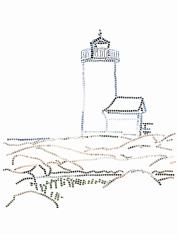
Tiles applied to the outline of an image.

You can create a mosaic from a clone with tracing paper turned off to hide the clone source image.
|
2
|
Choose Effects  Esoterica Make Mosaic. Esoterica Make Mosaic. |
|
3
|
In the Make Mosaic dialog box, click the Apply Tiles button  . . |

You can also specify that Corel Painter automatically fill an area with tiles by using the Stroke Selections and Fill Selection commands from the Options list box in the Make Mosaic dialog box. For more information, see Stroking and filling a selection with mosaic tiles.
|
1
|
Choose File Open, and locate the file that you want to clone. |
|
3
|
Choose Effects Esoterica Make Mosaic. |
|
4
|
Click the Clone Color button  in the Colors panel. in the Colors panel. |
|
5
|
In the Make Mosaic dialog box, click the Apply Tiles button . |
You can monitor the progress of the clone-based mosaic by viewing the image with the Use Tracing Paper check box enabled. This lets you see a faded out version of the clone source.
Copyright 2013 Corel Corporation. All rights reserved.