|
|
|
|
|
2
|
In Timeline view, click the
|
|
3
|
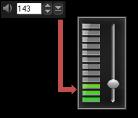
Speak into the microphone and check if the meter responds accordingly. You can use the Windows audio mixer to adjust the level of the microphone.
|
|
4
|
Click Start and begin speaking into the microphone.
|
|
5
|
|
1
|
|
2
|
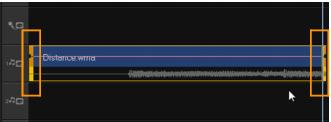
Select the tracks to be imported in the Track List.
|
|
3
|
Click Browse and select the destination folder where the imported files will be saved.
|
|
4
|
Click Rip to start importing the audio tracks.
|
|
1
|
Click Auto Music in the Toolbar.
|
|
3
|
Select the Filter to determine the classification and genre of the music to be used in your project.
|
|
4
|
|
5
|
Select a Variation of the selected music. Click Play Selected Music to play back the music with the variation applied.
|
|
6
|
Click Add to Timeline and set the volume level of the audio clip.
|
|
|
|
1
|
|
2
|
|
3
|
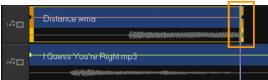
Enter a value in Speed or drag the slider to change the speed of the audio clip. A slower speed makes the clip’s duration longer while a faster speed makes it shorter.
|
|
|
|
|
|
1
|
|
2
|
|
4
|
|
6
|
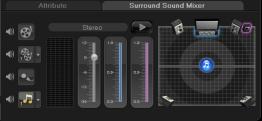
Drag Volume to adjust the volume level of the audio.
|
|
|
Six-channel VU Meter — Front Left, Front Right, Center, Sub-woofer, Surround Left, Surround Right.
|
|
|
Center — Controls the amount of output sound from the center speaker.
|
|
|
Sub-woofer — Controls the amount of low-frequency sound output.
|
|
1
|
|
2
|
|
3
|
|
4
|
|
1
|
Click on an audio clip and open the Options Panel.
|
|
2
|
|
3
|

|
4
|
Click OK.
|
|
|
Was this page helpful? Send feedback.
(Internet connection required.)
|